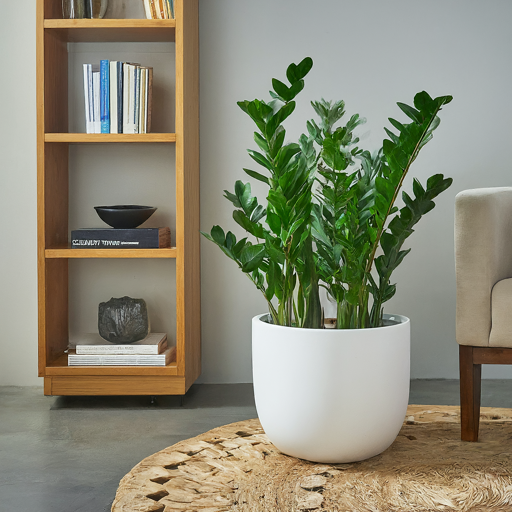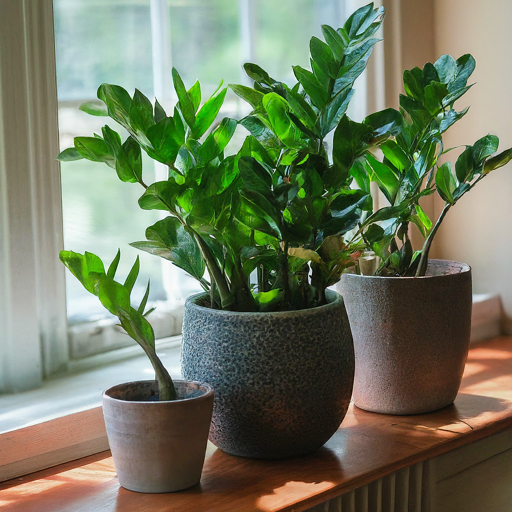
Have you ever craved a splash of emerald green in your home but worried you’d kill it with neglect? Fear not, plant-phobic friends! The ZZ plant (Zamioculcas zamiifolia) is here to become your low-maintenance leafy companion. This tropical wonder boasts glossy, upright fronds that add a touch of elegance to any space, and the best part? It’s practically impossible to eliminate.
So, are you ready to cultivate your own indoor jungle, one ZZ plant at a time? Buckle up, because we’re about to delve into the world of ZZ plant parenthood. With these seven easy tips, you’ll be a ZZ pro in no time!
This post may have affiliate links. This means that sometimes when you click a link on our site and make a purchase on Amazon, we may earn a small commission at no additional cost to you. We only recommend products we truly believe in, and your support helps keep us running!
1. Finding the Perfect Place: Light It Up (But Not Too Much!)

Imagine your ZZ plant as a laid-back vacationer. It thrives in moderate light conditions, similar to a spot under a beach umbrella. While it can tolerate lower light, brighter indirect light will encourage faster growth and more vibrant foliage. Avoid harsh, direct sunlight, which can scorch the leaves.
Here are some golden locations for your ZZ plant:
- A few feet away from a south-facing window with sheer curtains
- Next to an east-facing window
- A brightly lit corner of a room
Not sure if your ZZ plant is getting enough light? Look for signs like slow growth, leggy stems reaching for light, or leaves losing their vibrant color. If this happens, simply adjust its position to a brighter spot.
2. The Potting Mix: A Recipe for Drainage Success
Imagine your ZZ plant’s roots as synchronized swimmers. They need a well-draining potting mix that allows them to breathe and prevents waterlogging. Opt for a commercial cactus soil mix, or create your own by combining equal parts potting soil, perlite, and orchid bark. This combination provides excellent drainage and aeration, keeping your ZZ plant happy and healthy.
Here’s a bonus tip: Choose a pot with drainage holes at the bottom. This allows excess water to escape, preventing root rot, the bane of any houseplant parent’s existence.
3. Watering Wisely: The Art of Neglect (Almost)
Kindly note that vacationing ZZ plant we mentioned? Well, it also embodies the spirit of a low-maintenance traveler. Unlike high-needs divas of the plant world, ZZ plants excel at surviving on minimal water. Their underground rhizomes (think of them as plant potatoes) store water, allowing them to tolerate periods of drought.
Here’s the watering philosophy for ZZ plants:
- Water deeply when the top inch of soil feels completely dry.
- Avoid letting the plant sit in water. Empty any water that accumulates in the drainage tray after watering.
- During the winter months, water even less frequently.
Overwatering is a bigger threat to ZZ plants than underwatering. Signs of overwatering include yellowing leaves, mushy stems, and a foul odor. If you notice these, stop watering immediately and allow the soil to dry out completely before watering again. In severe cases, repotting with fresh soil might be necessary.
4. Feed Me (But Not Too Often!): Fertilizer for Growth Spurts
While ZZ plants aren’t heavy feeders, a little fertilizer boost can encourage healthy growth and promote the emergence of new, glossy leaves. Here’s the key: moderation is key.
- Feed your ZZ plant a balanced liquid fertilizer diluted to half strength during the growing season (spring and summer) once a month.
- Skip fertilizing altogether during the winter months when growth slows down.
Overfertilizing can damage the roots and stunt growth. Remember, less is always more when it comes to feeding your ZZ plant.
5. Keeping it Clean: A Dust Bath (Without the Bath)
ZZ plant leaves are naturally glossy and don’t require frequent cleaning. However, dust buildup can hinder their ability to photosynthesize. Here’s how to keep your ZZ plant looking its best:
- Wipe down the leaves gently with a damp cloth every few months to remove dust.
- Avoid using harsh chemicals or commercial leaf shines, as they can damage the leaves.
Bonus tip: If your ZZ plant gets a bit leggy, you can gently prune the taller stems to encourage bushier growth. Just be sure to sterilize your pruning shears to prevent the spread of diseases.
6. Repotting on Schedule: Making Room for Growth
As your ZZ plant matures, its root system will expand. To provide enough space for continued growth, repotting is necessary every two to three years, or when the roots become pot-bound. Here are the signs that your ZZ plant needs a new home:
Signs Your ZZ Plant Needs a Repotting:
- Roots pushing out of the drainage holes: This is a clear indication that the pot is overflowing with roots, leaving no space for further growth.
- The plant appears stunted: If your ZZ plant hasn’t grown much in a year, despite receiving proper care, it might be root-bound.
- The soil dries out incredibly quickly: When the roots fill the pot, they absorb water faster, leaving the soil dry almost immediately after watering.
Repotting Tips:
- Choose a new pot that’s only one to two inches larger in diameter than the current one. A pot that’s too big can lead to overwatering issues.
- Spring is the ideal time for repotting ZZ plants as they’re actively growing during this season.
- Gently remove the plant from its current pot and loosen the root ball slightly. Avoid disturbing the roots too much.
- Place the plant in the new pot with fresh potting mix, ensuring the crown (the area where the leaves meet the stem) sits slightly above the soil level.
- Water thoroughly after repotting and allow the excess water to drain freely.
7. Troubleshooting Common ZZ Plant Problems: A Plant Whisperer’s Guide
Even the most low-maintenance plants can face occasional challenges. Here’s a quick guide to diagnosing and solving some common ZZ plant problems:
Problem: Yellowing leaves
Possible Causes:
- Overwatering: The most likely culprit. Check the soil moisture and adjust your watering habits.
- Lack of light: Move the plant to a brighter location with indirect sunlight.
Problem: Brown spots on leaves
Possible Causes:
- Excessive sun exposure: Relocate the plant to a shadier spot.
- Underwatering: Water the plant deeply when the top inch of soil dries out.
Problem: Drooping leaves
Possible Causes:
- Overwatering: This is the most common reason. Check for root rot and repot if necessary.
- Underwatering: Water the plant thoroughly and monitor the soil moisture.
