
Agave plants, with their architectural rosettes and sculptural forms, lend a touch of the desert’s charm to any space. But did you know these majestic succulents can be easily propagated at home, creating a whole new generation of spiky wonders? This guide will equip you with the knowledge and confidence to transform your existing agave into a flourishing colony.
Unveiling the Agave’s Offspring: Pups and Offshoots
Unlike many plants that rely on seeds for propagation, agaves primarily reproduce through pups or offsets. These are smaller versions of the mother plant that emerge at the base, forming clusters around the mature agave.
- Pups: These are the most common type of agave offspring. They appear as miniature replicas of the parent plant, complete with their own rosette of leaves. Pups can vary in size, with some emerging tiny and others boasting a respectable head start.
- Offshoots: Less frequent than pups, offshoots are essentially “runners” that sprout from the mother plant’s underground stem. They may travel a short distance before pushing up a new rosette of leaves, forming a separate clump away from the main plant.
Preparing for Agave Propagation: Tools and Timing
It’s essential to gather the necessary tools before propagating your agave plants
Tools of the Trade:
- Sharp knife or pruners: Opt for sterilized tools to ensure a clean cut and prevent the spread of diseases.
- Gloves: Agave leaves have sharp spines, so gloves will protect your hands while handling the plant.
- Potting mix: Choose a well-draining cactus or succulent mix to provide proper drainage for your new agave pups.
- Pots: Select pots with drainage holes sized appropriately for the pup’s root system. Opt for terracotta pots to promote airflow and prevent root rot.
- Fungicide (optional): Applying a fungicide to the cut end of the pup can help prevent rot, especially in humid environments.
Seizing the Right Season:
Spring and early summer are generally considered the ideal seasons for agave propagation. During this time, the plants are actively growing, which increases their success rate in establishing new roots.
The Art of Detaching Agave Pups
Now that you’re armed with the right tools and timing, let’s get down to the propagation process!
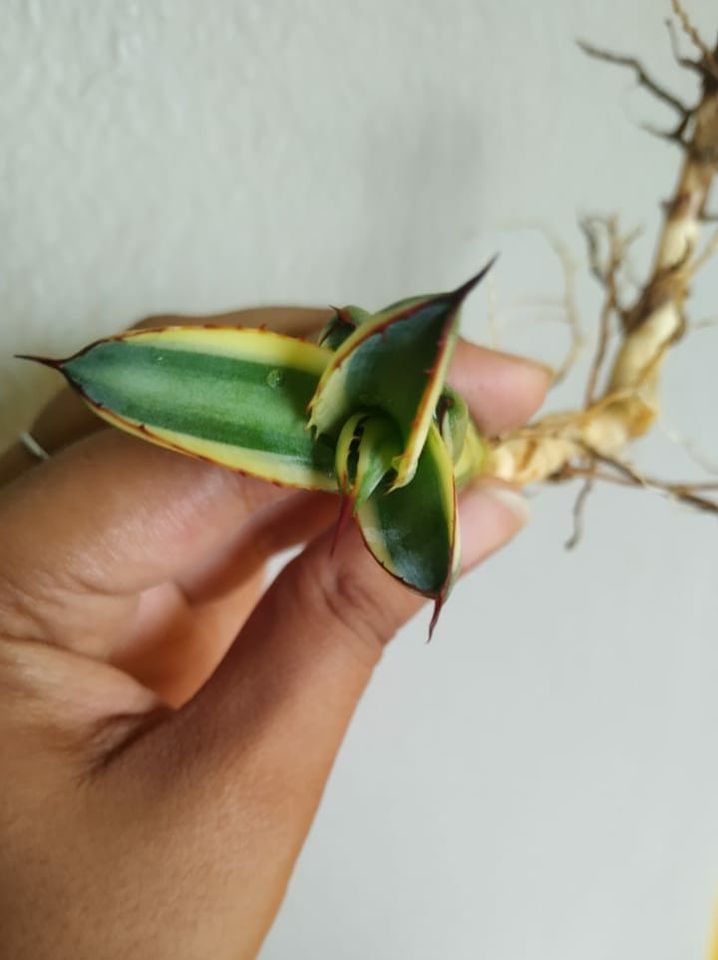
- Gently Unearth the Pup: Carefully loosen the soil around the base of the pup using your hands or a small trowel. Be mindful not to damage the roots of either the pup or the mother plant.
- Separate with Precision: Using your sterilized knife or pruners, make a clean cut at the base where the pup connects to the mother plant. If the pup is small and doesn’t have a clear separation point, you can gently twist it to encourage it to detach.
- Clean Up and Callous Over: Remove any damaged or broken leaves from the pup. Allow the cut end of the pup, and the mother plant if there’s a wound, to air dry for a few days. This callousing process helps prevent infection.
Pro Tip: If the pup is particularly small, you can leave it attached to the mother plant for a while longer to allow it to develop a stronger root system before complete separation.
Planting Your Agave Offspring: A Recipe for Success
With your calloused pup in hand, it’s time to create the perfect environment for it to thrive.
- Prepare the Potting Mix: Moisten the cactus or succulent mix slightly, ensuring it’s damp but not soggy.
- Nestle the Pup in its New Home: Place the pup in the center of the pot, ensuring the base of the rosette sits slightly above the soil level.
- Backfill and Secure: Gently fill the pot with the prepared potting mix, firming it around the base of the pup to provide support. Avoid burying the rosette of leaves.
- Watering Wisely: Resist the urge to overwater! Water the pup sparingly at this stage, just enough to moisten the soil.
Pro Tip: Consider placing the newly potted pup in a location with indirect sunlight for a few weeks before gradually introducing it to more sun exposure.
Aftercare for Your Agave Progeny
The key to successfully propagating your agave is providing proper aftercare. Here’s what your new spiny friend needs to flourish:
- Light: Agaves are sun-loving succulents. Once established, they thrive in bright, indirect sunlight for several hours a day. However, young pups may need some protection from harsh midday sun during the initial acclimation period.
- Watering: Water deeply but infrequently, allowing the soil to dry completely between waterings. Overwatering is a major threat to agaves, as it can lead to root rot.
- Feeding: Fertilizing is not necessary for agaves, especially during the propagation stage. They are accustomed to surviving in nutrient-poor environments.
- Potting Up: As your agave pup matures and its root system expands, it will eventually need a larger pot. Repot every 2-3 years, choosing a pot that’s only slightly larger than the current one.
- Winter Care: Most agave varieties are moderately cold tolerant. However, if you live in a region with harsh winters, it’s advisable to protect your young agave pups from freezing temperatures. You can cover them with frost cloth or move them indoors to a sheltered location.
Patience is a Virtue: Witnessing Your Agave Thrive
Agave propagation is a rewarding yet patient process. While these succulents are known for their slow growth, witnessing the transformation of a tiny pup into a majestic agave with its spiky splendor is a truly satisfying experience.
Don’t be discouraged if your pup doesn’t exhibit rapid growth. Focus on providing it with the proper care, and over time, you’ll be rewarded with a thriving agave that will add a touch of exotic beauty to your home or garden.
Bonus Tip: Sharing the Spiky Love
Once your propagated agaves are established, you can use them to expand your personal collection or share the joy with friends and family. Propagated agaves make excellent gifts for any plant enthusiast, offering a unique and personal touch.