Potato is a versatile, delicious, and surprisingly easy-to-grow vegetable that has sustained societies for centuries. But what if you could cultivate this culinary staple not just from store-bought bags, but from sprouted potatoes sitting in your pantry? This guide unlocks the secrets to transforming those sprouted spuds into a flourishing potato patch, bursting with homegrown goodness.
Preparing Your Sprouted Soldiers: The Art of Chitting
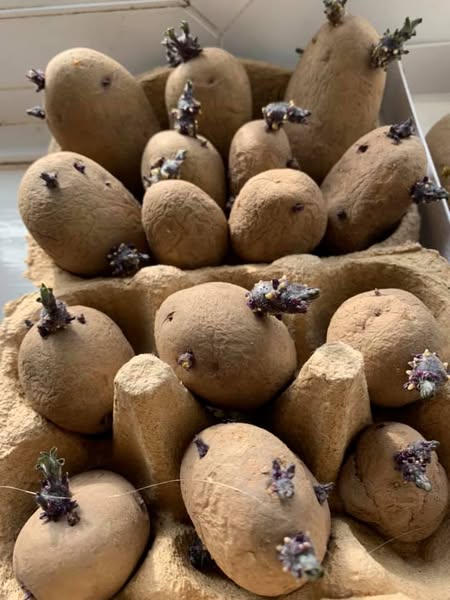
Before we delve into the soil, let’s talk about getting your sprouted potatoes battle-ready. This process, lovingly known as “chitting,” encourages the development of strong, healthy shoots, ultimately leading to a more bountiful harvest.
- The Great Awakening: Place your potatoes in a cool, well-lit location, away from direct sunlight. Egg cartons or paper bags make perfect homes for this stage.
- Eye on the Prize: After a few weeks, you’ll witness the magic unfold. Tiny sprouts, called “eyes,” will emerge from the potato’s skin. These are the future potato plants, so treat them with care.
- Selective Service: Once the sprouts reach about an inch (2.5 cm) long, it’s time to make some tough choices. Gently rub off any weak or spindly sprouts, leaving only the 2-3 strongest ones on each potato. This ensures your plant focuses its energy on producing robust stems and delicious tubers.
Planting Powerhouse: Choosing the Perfect Canvas
Now that your sprouted potatoes are prepped and primed, it’s time to select the ideal canvas for their growth. Here’s how to create the perfect environment for your potato plants to thrive:
Location, Location, Location: Opt for a sunny spot in your garden that receives at least 6-8 hours of direct sunlight daily. Potatoes are sun-worshippers, and ample sunlight translates to happy, productive plants.
Soil Secrets: Well-draining, loose soil is key. Amend your existing soil with compost or aged manure to create a fertile, nutrient-rich environment. Aim for a slightly acidic soil pH of 6.0-6.8.
Planting Party: When the danger of frost has passed (typically 2-4 weeks before your last expected spring frost), it’s time to plant! Dig trenches 6-8 inches (15-20 cm) deep and 12-16 inches (30-40 cm) apart. Gently place your sprouted potatoes in the trenches with the “eyes” facing upwards. Cover them with soil, leaving a slight mound around the base of each potato.
Nurturing Your Sprouts: A Recipe for Success
With your sprouted soldiers planted, the nurturing journey begins. Here are some key ingredients for ensuring your potato patch thrives:
Watering Wisdom: Water your potato plants regularly, especially during hot and dry periods. Aim to keep the soil consistently moist, but avoid creating a waterlogged environment. A good rule of thumb is to water deeply every few days, allowing the top inch (2.5 cm) of soil to dry out between waterings.
Feeding Frenzy: As your plants grow, provide them with a light feeding every 4-6 weeks using a balanced fertilizer or aged compost tea. This will give them the extra boost they need to produce a bountiful harvest.
Hilling Up for Success: As your potato plants mature, their stems will begin to stretch above the soil. This is where the art of “hilling” comes in. Gently pull soil up around the base of the stems, creating a mound about 6-8 inches (15-20 cm) high. This technique encourages the formation of more potatoes underground and protects them from exposure to sunlight, which can turn them green and bitter.
Pest Patrol: Keep an eye out for common potato pests like potato beetles and aphids. You can use organic methods like insecticidal soap or neem oil to control these unwanted visitors.
The Grand Harvest: Reaping the Rewards of Your Labor
The moment you’ve been waiting for! After 70-90 days from planting (depending on the potato variety), your potato plants will begin to die back. This is your signal that the potatoes are ready to be harvested.
Unearthing the Treasure: Carefully dig around the base of the plant and gently lift the potatoes from the soil. Be patient and avoid damaging the delicate tubers.
Storing Your Bounty: Allow your freshly harvested potatoes to dry in a cool, well-ventilated area for a few days. This process, called “curing,” helps to toughen the skin and prevent them from spoiling too quickly. Once cured, store your potatoes in a cool, dark place with good ventilation, like a root cellar or a basket in a cool pantry.
Frequently Asked Questions (FAQs)
How do I inspect sprouted potatoes for planting?
When inspecting sprouted potatoes, look for firm, healthy sprouts. Avoid using potatoes with soft or mushy sprouts, as they may be diseased or damaged. Additionally, check for any signs of rot or disease on the potato itself.
Do I need to cut the sprouted potatoes before planting?
No, you do not need to cut sprouted potatoes before planting. Plant them as whole potatoes to maximize their growth potential.
What is the best location for planting sprouted potatoes?
Potatoes thrive in well-drained soil and full sunlight. Choose a location in your garden that receives at least six hours of direct sunlight per day. Ensure the soil is loose, rich in organic matter, and has good drainage.