Discover the limitless potential of using plastic bottles for seedlings and experience the genius techniques that promote green growth while reducing waste. Explore innovative ways to harness the power of plastic bottles in your gardening endeavors. From creating mini greenhouses to self-watering planters, these techniques not only nurture your seedlings but also contribute to a healthier environment. Let’s dive in and unlock the secrets of using plastic bottles for sustainable gardening.
Table of Contents
Benefits Of Using Plastic Bottles for Seedlings
Using plastic bottles for seedlings offers several benefits:
- Cost-effective: Plastic bottles are readily available and inexpensive, making them a cost-effective alternative to purchasing seedling trays or pots.
- Recycling and repurposing: By repurposing plastic bottles for seedlings, you contribute to recycling efforts and reduce waste by giving new life to materials that would otherwise end up in landfills.
- Easy availability: Plastic bottles can be found in abundance, making them easily accessible for anyone interested in starting a gardening project.
- Portability: Plastic bottles are lightweight and portable, allowing you to easily move your seedlings indoors or outdoors as needed, providing flexibility in their growing conditions.
- Self-watering capabilities: One of the good advantages of using plastic bottles for seedlings is that plastic bottles can be transformed into self-watering planters, providing a consistent water supply to seedlings, reducing the need for frequent watering.
By utilizing plastic bottles for seedlings, you can enjoy these benefits while embracing an eco-friendly approach to gardening.
Revolutionize Your Gardening with Plastic Bottle Seedling Techniques
Essential Tools and Materials
Before we dive into the techniques, let’s gather the tools and materials you will need for these expert-approved plastic bottle gardening techniques:
- Plastic bottles (varying sizes, depending on the method you choose)
- Scissors or a utility knife
- Marker or pen for labeling
- Potting soil or seed-starting mix
- Seeds or seedlings
- Watering can or spray bottle
- Optional: tape, string, or wire for additional support
Genius Techniques for Using Plastic Bottles For Seedlings
Method 1: Mini Greenhouse – Sheltered Growth for Healthy Seedlings
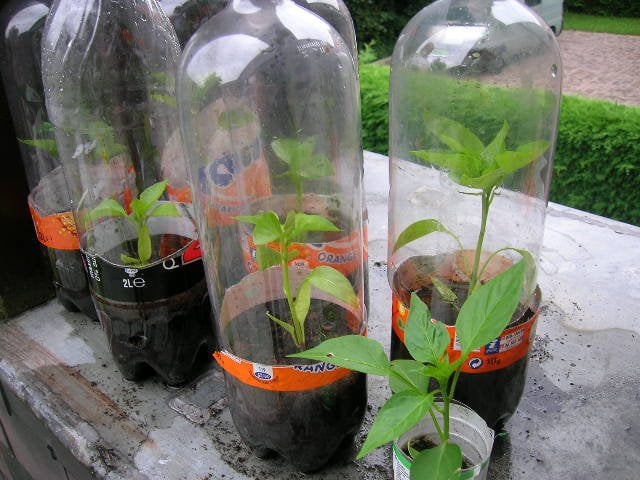
- Step 1: Prepare your plastic bottle by removing the bottom using scissors or a utility knife. Remember to wear gloves and exercise caution when handling sharp objects.
- Step 2: Fill the bottom part of the bottle with high-quality potting soil or seed-starting mix, providing a nourishing foundation for your seedlings.
- Step 3: Plant your seeds or seedlings in the soil, following recommended depths and spacing. Consider using biodegradable pots or seedling trays for easier transplanting.
- Step 4: Place the top part of the bottle, with the cap removed, upside down over the soil-filled section, creating a sheltered environment for your seedlings.
- Step 5: Secure the two sections together using tape or by tightly screwing on the cap. Ensure the seal is airtight for optimal greenhouse conditions.
- Step 6: Position the mini greenhouse in a warm and well-lit area, away from direct sunlight that may cause excessive heat buildup. Monitor temperature and adjust placement accordingly.
- Step 7: Regularly monitor moisture levels and water as needed through the bottle’s opening.
- Step 8: Once the seedlings have grown and established, gradually expose them to outdoor conditions by removing the bottle during the day and returning it at night. This helps them acclimate before transplanting.
Recommended Plants: Using plastic bottles for seedlings is good for this method and is ideal for starting a wide range of seedlings, including vegetables like tomatoes, peppers, cucumbers, and herbs like basil, parsley, and cilantro. It also works well for flowering plants such as marigolds and petunias.
Safety Precautions: Wear gloves when handling sharp objects. Keep plastic bottles out of reach of children and pets to prevent accidents.
Environmental Benefit: By repurposing plastic bottles as mini greenhouses, you contribute to waste reduction and minimize the environmental impact of traditional gardening materials.
Limitations/Challenges Using Plastic Bottles For Seedlings In Mini Greenhouses
- Limited space for seedling growth: The size of the plastic bottle limits the amount of space available for seedling growth. It may not be suitable for larger plants or varieties that require more space.
- Temperature regulation: While mini greenhouses provide sheltered conditions, temperature control may be a challenge. Excessive heat buildup can occur, especially in direct sunlight, potentially harming the seedlings.
Method 2: Self-Watering Planter – Sustained Moisture for Thriving Plants
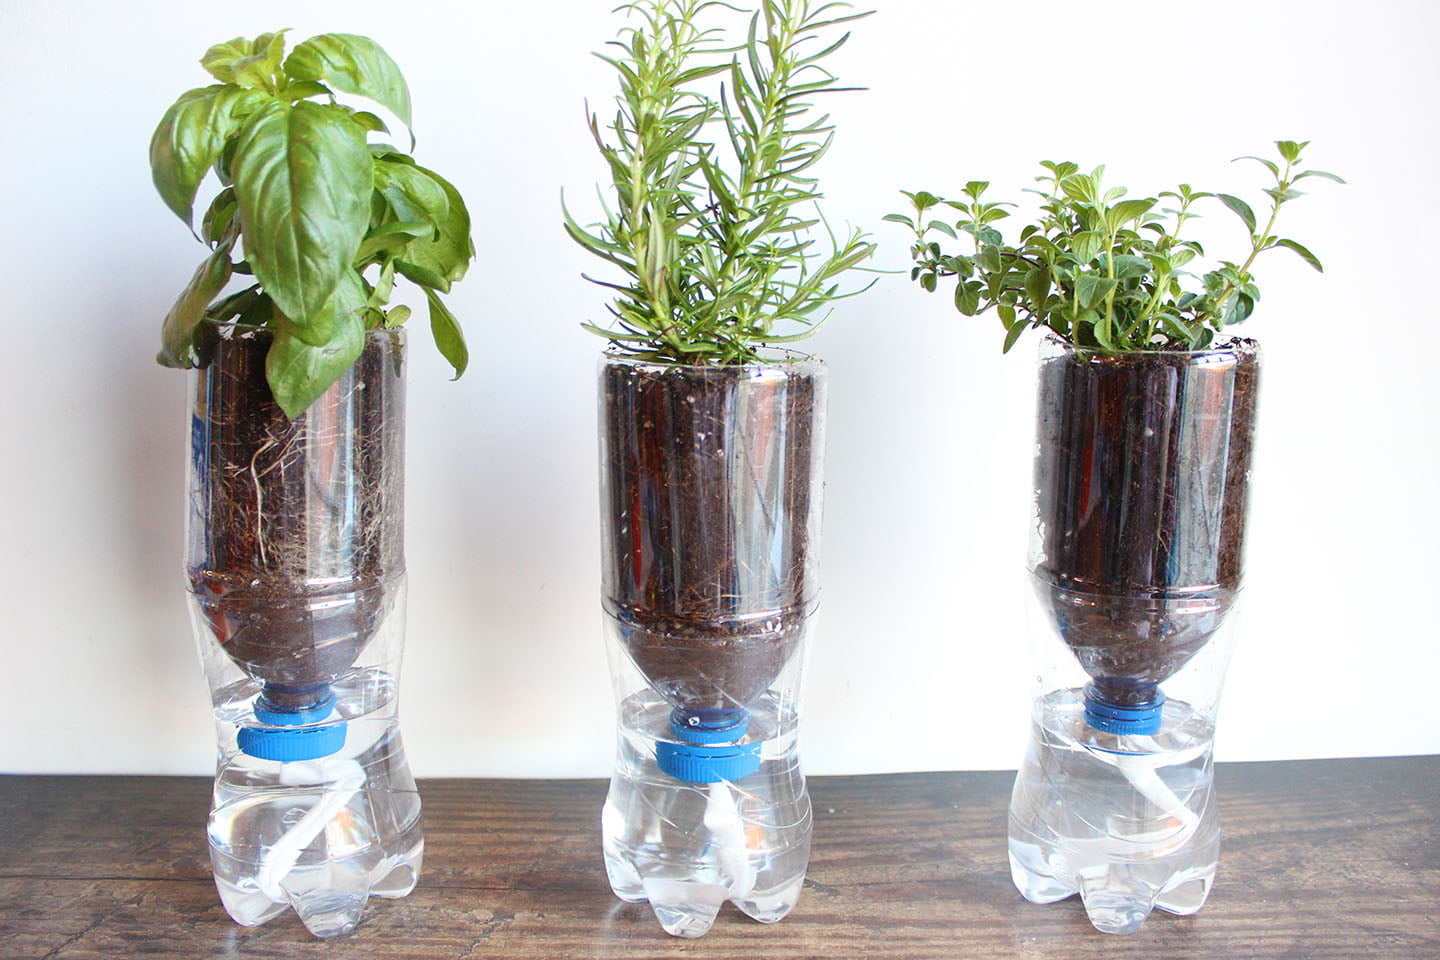
- Step 1: Cut off the bottom third of the plastic bottle and set it aside. Take care when using sharp tools and wear protective gloves
- Step 2: Create a wick by twisting a strip of cotton cloth or an old t-shirt and insert it through the bottle’s cap opening, extending it into the upper section of the bottle.
- Step 3: Fill the remaining upper part of the bottle with high-quality potting soil or seed-starting mix, ensuring a suitable growing medium for your plants.
- Step 4: Plant your seeds or carefully transfer seedlings into the soil, providing them with ample space to grow and thrive. Consider choosing plants that benefit from consistent moisture.
- Step 5: Fill the bottom section of the bottle with water until it reaches the level of the wick. The wick will draw water from the reservoir, providing a sustained moisture supply for your plants.
- Step 6: Reattach the top section of the bottle to the bottom section, ensuring a snug fit to maintain the self-watering mechanism. Confirm that the wick is in contact with the water.
- Step 7: Place the self-watering planter in a suitable location, avoiding direct sunlight that may cause excessive evaporation. Monitor the moisture levels by checking the water reservoir regularly
- Step 8: Refill the water reservoir as needed through the bottle’s opening, maintaining a consistent moisture level for your plants’ optimal growth and development.
Recommended Plants: Plants that benefit from consistent moisture and can withstand self-watering conditions are suitable for this method when using plastic bottles for seedlings. Examples include herbs like mint, chives, and oregano, as well as leafy greens like lettuce and spinach.
Safety Precautions: Use caution when cutting the plastic bottle. Always wear gloves and keep sharp objects away from children and pets.
Environmental Benefit: By using self-watering planters made from plastic bottles, you conserve water and promote resource efficiency in your gardening practices.
Limitations/Challenges Using Plastic Bottles For Seedlings In Self-Watering Planter
- Risk of overwatering: The self-watering system relies on the wick to draw water from the reservoir. If the wick is too efficient or if the reservoir is filled too frequently, overwatering may occur, leading to root rot and other moisture-related issues.
- Limited water capacity: The size of the plastic bottle determines the amount of water the reservoir can hold. Larger plants or those with higher water requirements may need more frequent refilling, requiring extra attention and maintenance.
Method 3: Hanging Herb Garden – Fresh Flavors at Your Fingertips
- Step 1: Cut out a section from the side of a plastic bottle, leaving a small lip at the bottom to hold the soil. Remember to exercise caution when using sharp tools and wear gloves for protection.
- Step 2: Create drainage holes in the bottom of the bottle to prevent waterlogging and ensure proper soil moisture.
- Step 3: Fill the bottle with nutrient-rich potting soil, leaving enough space for the herb’s roots to grow and spread.
- Step 4: Carefully plant your chosen herb or herb seeds in the soil, ensuring they are adequately spaced for healthy growth. Consider a variety of herbs for a diverse and flavorful garden.
- Step 5: Attach sturdy strings or wire to the bottle, creating a secure hanging mechanism. Choose a location near a sunny window or in your garden to provide adequate sunlight for the herbs.
- Step 6: Hang the bottle, ensuring it is stable and well-balanced. Adjust the height to accommodate the growth of the herbs.
- Step 7: Water the herb regularly, allowing excess water to drain out through the holes at the bottom.
- Step 8: Harvest your fresh herbs as they grow and incorporate their flavors into your culinary adventures. Regular pruning encourages bushier growth and prolongs the herb’s lifespan.
Recommended Plants: Using plastic bottles for seedlings favors herbs because they are perfect for hanging herb gardens due to their compact size and culinary uses. Choose herbs like thyme, rosemary, sage, and dill. Basil varieties, such as Genovese basil or Thai basil, also thrive in hanging gardens.
Safety Precautions: Take care when using sharp tools and wear gloves to protect your hands. Keep plastic bottles out of reach of children and pets.
Environmental Benefit: By creating a hanging herb garden using plastic bottles for seedlings, you promote sustainable gardening practices, reduce waste, and have access to fresh, homegrown herbs right at your fingertips.
Limitations/Challenges Using Plastic Bottles For Seedlings In Hanging Herb Garden
- Limited root space: The size of the plastic bottle restricts the root space available for the herbs. This may not be suitable for herbs that require more extensive root systems or those that prefer larger containers for growth.
- Limited plant variety: The small size of the hanging bottle may not accommodate a wide variety of herbs simultaneously. If you want to start using plastic bottles for seedlings, consider selecting herbs that have similar growth habits and space requirements.
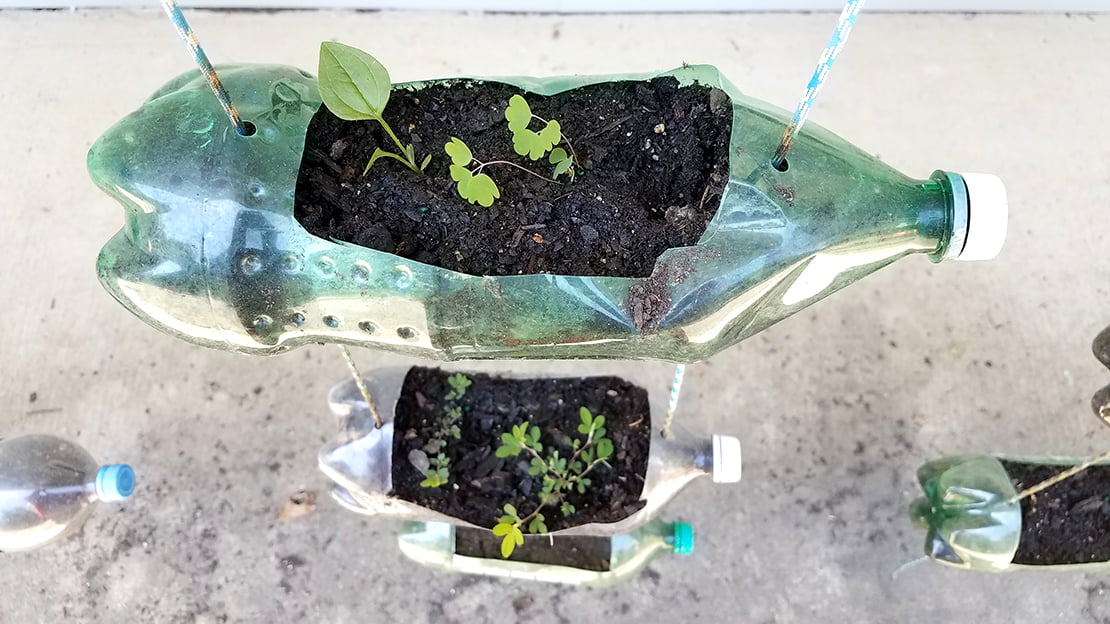
Method 4: Vertical Garden – Maximize Space with Lush Greenery
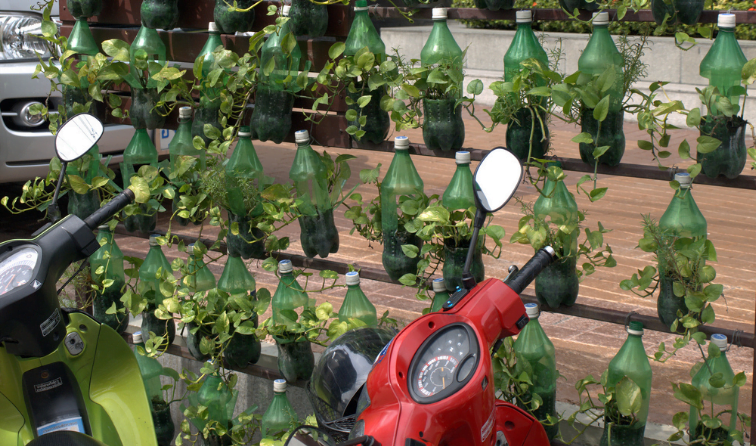
- Step 1: Select a large plastic bottle and remove the bottom using scissors or a utility knife. Use caution when handling sharp tools and wear protective gloves.
- Step 2: Cut out several small rectangular openings along the bottle’s sides, leaving enough space for plants to grow and thrive. You can adjust the size and number of openings based on the plant’s root size and growth requirements.
- Step 3: Fill the bottle with high-quality potting soil, ensuring it is evenly distributed and providing adequate nutrients for the plants.
- Step 4: Plant your chosen plants or seedlings in the rectangular openings, taking care not to overcrowd them. Consider a mix of flowering plants, herbs, or trailing vines for an aesthetically pleasing vertical garden.
- Step 5: Hang the bottle vertically, securing it with sturdy strings or hooks. Ensure the structure is stable and can support the weight of the plants.
- Step 6: Water the plants regularly, allowing any excess water to drain out through the openings. Aim for consistent moisture without overwatering.
- Step 7: Place the vertical garden in a location that receives sufficient sunlight for healthy growth. Consider rotating the bottle periodically to ensure all sides of the plants receive adequate light.
- Step 8: Marvel at your vibrant vertical garden as it adds beauty and greenery to even the smallest spaces. Regularly prune and care for the plants to maintain their health and appearance.
Recommended Plants: For vertical gardens, when using plastic bottles for seedlings, opt for plants that have trailing or cascading growth habits. Some excellent choices include trailing petunias, trailing vinca, ivy, sweet potato vine, and trailing herbs like trailing rosemary or trailing thyme.
Safety Precautions: Take caution when cutting the plastic bottle and handling sharp tools. Wear gloves to protect your hands. Keep plastic bottles away from children and pets.
Environmental Benefit: Vertical gardens made from repurposed plastic bottles optimize space utilization, minimize the carbon footprint, and contribute to a greener environment by adding lush greenery to urban settings.
Limitations/Challenges Using Plastic Bottles For Seedlings In Vertical Garden
- Weight limitations: Depending on the strength and stability of the hanging mechanism, the weight of the plants and soil in the vertical garden may pose a challenge. Ensure that the structure can adequately support the weight to prevent accidents or damage.
- Limited root space: The size of the plastic bottle limits the root space available for each plant in the vertical garden. This may not be suitable for plants that require extensive root systems or those that prefer larger containers for growth.
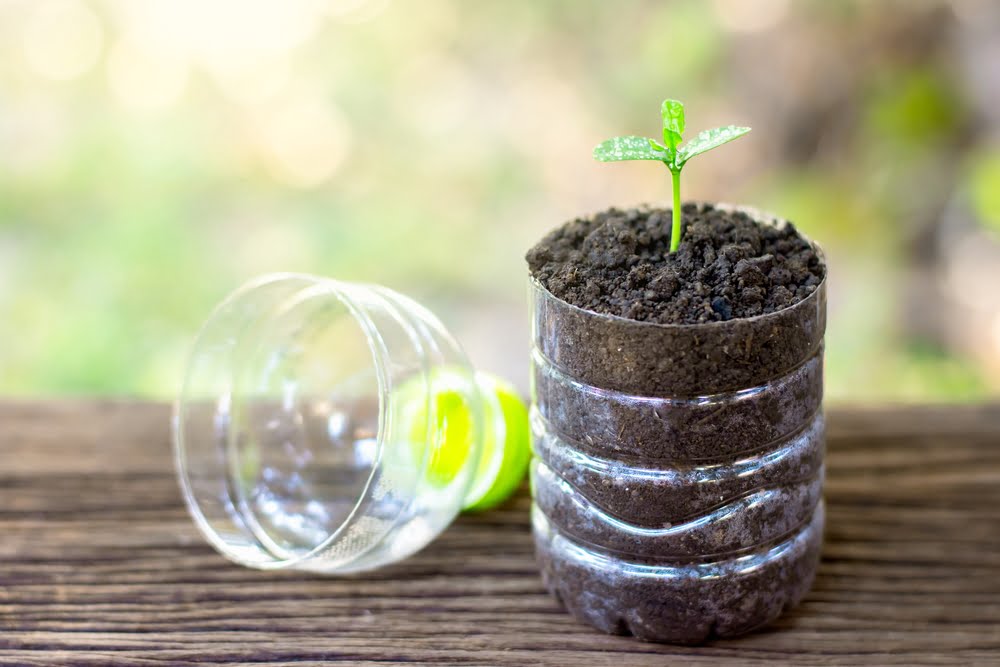
Method 5: Seedling Transplanters – Smooth Transition to the Garden
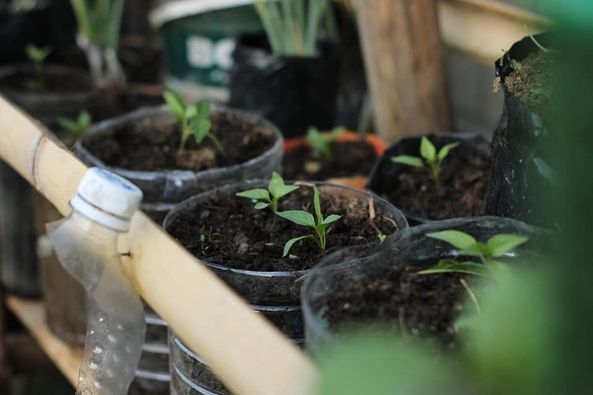
- Step 1: Cut off the bottom of a plastic bottle, creating a transplanting container. Use caution when cutting and handling sharp tools. Remember to wear gloves for protection.
- Step 2: Fill the bottle with a suitable potting soil or seed-starting mix, ensuring it provides adequate nutrients and drainage for the seedlings.
- Step 3: Plant your seedlings in the soil, ensuring they are properly spaced and positioned for optimal growth. Label each bottle with the plant variety to keep track of your seedlings.
- Step 4: Carefully transplant the seedlings into their designated spots in your garden or larger containers. Dig a hole in the soil, place the seedling along with the plastic bottle into the hole, and cover it with soil.
- Step 5: Water the transplanted seedlings gently, ensuring they receive enough moisture to establish themselves in their new environment.
- Step 6: Provide proper care and attention to the transplanted seedlings, including regular watering, monitoring for pests or diseases, and offering support if needed.
- Step 7: Watch with satisfaction as your seedlings grow and thrive in their new homes, benefiting from the protection and support provided by the plastic bottle transplanted.
- Step 8: Celebrate the success of your green growth nurtured by the power of repurposed plastic bottles, knowing that you have made a positive impact on the environment and reduced waste.
Recommended Plants: Using plastic bottles for seedlings is good for this method because it is versatile and suitable for various seedlings. You can use it for vegetables like lettuce, broccoli, cabbage, and tomatoes, as well as flowers like marigolds, zinnias, and cosmos.
Safety Precautions: Exercise caution when using sharp tools to cut the plastic bottle. Wear gloves to protect your hands. Keep plastic bottles out of reach of children and pets.
Environmental Benefit: By using plastic bottles as seedling transplanters, you contribute to waste reduction and promote sustainable gardening practices, reducing the need for disposable plant containers.
Limitations/Challenges Using Plastic Bottles For Seedlings In Seedling Transplanter
- Transplant shock: Transplanting seedlings from plastic bottles to the garden or larger containers can cause transplant shock, especially if the seedlings have become accustomed to the sheltered conditions provided by the bottle. Extra care and attention are needed to ensure successful adaptation to the new environment.
- Restricted root growth: The limited space within the plastic bottle restricts the root growth of the seedlings when using plastic bottles for seedlings. This may impact the plants’ overall health and their ability to establish themselves in the new location.
Conclusion:
Using plastic bottles for seedlings is a creative, cost-effective, and environmentally friendly approach to gardening. By repurposing these everyday objects, you can create ingenious tools that promote sustainable growth and nurture your plants. From mini greenhouses to self-watering planters, hanging herb gardens, vertical gardens, and seedling transplanters, the possibilities are endless. Not only do these techniques help reduce waste, but they also conserve resources and minimize the carbon footprint associated with traditional gardening practices. Embrace the potential of using plastic bottles for seedlings and transform your gardening journey into a sustainable and rewarding endeavor. Start today and witness the remarkable results of green growth nurtured by repurposed plastic bottles!