Are you tired of spending money on red potatoes at the grocery store? Do you want to grow your own red potatoes at home? If so, you’ve come to the right place! In this article, we’ll provide you with a step-by-step guide on how to grow red potatoes at home. We’ll cover everything from choosing the right potato variety to planting, caring for, and harvesting your potatoes. So, let’s dig into success and start growing your own red potatoes at home!
Choosing the Perfect Spuds:
(h3) Selecting Seed Potatoes:
- Certified Seed Potatoes: Opt for certified seed potatoes from a reputable nursery or garden center. These disease-free potatoes boast superior yields and offer optimal chances of success.
- Varieties: Red potatoes come in a kaleidoscope of flavors and textures. Consider popular choices like Norland, Red Pontiac, or Kennebec, based on your taste preferences and desired cooking methods.
(h3) Understanding Growing Conditions:
- Climate: Red potatoes thrive in cool-season weather, with ideal daytime temperatures ranging from 60-75°F (15-24°C).
- Sunlight: Aim for at least 6-8 hours of direct sunlight daily for optimal growth.
- Soil: Well-draining, loose soil with a slightly acidic pH (around 6.0-6.8) is ideal. Raised beds offer excellent drainage and control, making them a popular choice for homegrown potatoes.
Planting Your Potato Patch:
Now that you’ve gathered the essentials, it’s time to get your hands dirty and prepare your potato haven!
Preparing the Planting Area:
- Soil Test: Conduct a soil test to determine the nutrient content of your soil. This will help you tailor amendments accordingly.
- Amending the Soil: If necessary, enrich the soil with compost or aged manure to improve drainage, fertility, and water retention.
- Digging Trenches: Create trenches approximately 6-8 inches deep and 12-18 inches apart. The spacing allows for proper root development and air circulation.
Sowing the Seeds of Success:
- Cutting Seed Potatoes: Cut your certified seed potatoes into pieces, each containing at least 1-2 “eyes” (buds) per section. Allow the cut pieces to air dry for a few days to form a protective callus.
- Planting the Seed Pieces: Place the seed pieces eye-side up in the trenches, spacing them about 12 inches apart. Cover them gently with soil, ensuring the eyes are just under the surface.
Nurturing Your Potato Plants:
With the seeds sown, the journey of nurturing your potato plants begins. Here’s how to ensure their healthy growth:
Watering:
- Water your potato plants regularly, especially during hot and dry periods. Aim to keep the soil consistently moist, but not waterlogged.
- Deep watering, allowing water to penetrate several inches, encourages root development and prevents surface roots from drying out quickly.
Mulching:
- Apply a layer of organic mulch, such as straw or wood chips, around the base of your plants. Mulch helps retain moisture, suppress weeds, and regulate soil temperature.
Hilling:
- As your potato plants grow taller, gently pull soil up around the base of the stems in a process called hilling. This encourages the formation of more potatoes and protects developing tubers from sunlight exposure, which can turn them green and bitter. Repeat hilling every few weeks as the plants continue to grow.
The Joy of Harvest:
After months of diligent care, it’s finally time to reap the rewards of your labor!
Signs of Maturity:
- The potato plants will begin to die back naturally as the tubers mature underground. This usually occurs around 60-80 days after planting, depending on the variety.
- Yellowing and drying of the leaves are telltale signs that your potatoes are ready for harvest.
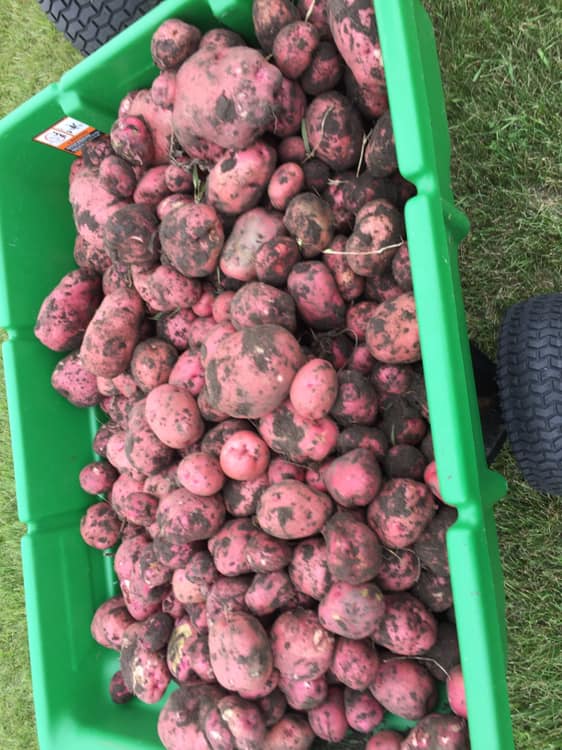
Harvesting Your Red Potatoes:
- Carefully dig around the base of the plant with a garden fork, gently lifting the soil to reveal the hidden treasures.
- Avoid damaging the delicate skins of the potatoes as you harvest them.
Beyond the Harvest (continued):
Rotating Crops:
- Practice crop rotation to help maintain soil health and prevent the buildup of pests and diseases. Avoid planting potatoes in the same location for consecutive years. Opt for planting legumes (beans, peas) or leafy greens the following season, as they help fix nitrogen in the soil, benefiting future potato crops.
Saving Seeds for Future Harvests:
- You can save a portion of your harvest for future plantings! Choose healthy, disease-free potatoes and allow them to air dry in a cool, dark location for several weeks. Once fully cured, store them in a well-ventilated container until the following planting season.
Note:
- Saved potatoes may not be as productive as certified seed potatoes, but they offer a cost-effective way to continue your potato-growing journey.
Troubleshooting Common Issues:
While growing red potatoes is relatively straightforward, some common issues can arise. Here’s how to identify and address them:
Potato Blight:
- This fungal disease can devastate potato plants, causing leaves to turn brown and wither. Practice preventative measures like using disease-resistant potato varieties and maintaining proper spacing and air circulation. If blight appears, remove infected leaves promptly and apply a fungicide according to the manufacturer’s instructions.
Colorado Potato Beetles:
- These bright yellow and red beetles, along with their larvae, can wreak havoc on potato foliage. Handpick and remove them from your plants, or use insecticidal soap spray if the infestation becomes severe.
Note:
- Always opt for organic pest control methods whenever possible to protect the environment and beneficial insects in your garden.