Whether you have limited outdoor space, want to enjoy fresh potatoes year-round, or simply love the idea of growing your food, cultivating potatoes indoors is an exciting and rewarding endeavor. In this comprehensive beginner’s guide, we will explore the art of growing potatoes indoors step by step. From selecting the right varieties to providing the ideal growing conditions and caring for your plants, we’ll cover all the essential techniques to help you embark on your indoor potato-growing journey. So, let’s dive in and discover the wonders of growing potatoes indoors!
Benefits of Growing Potatoes Indoors
Before we delve into the details, let’s explore the numerous benefits of growing potatoes indoors:
1.1. Year-Round Harvest
- Indoor potato gardening allows you to enjoy fresh potatoes throughout the year, regardless of the outdoor growing season.
- You can have a continuous supply of homegrown potatoes, even during winter months.
1.2. Space Efficiency
- Growing potatoes indoors is ideal for those with limited outdoor space or living in apartments and urban areas.
- You can utilize shelves, containers, or vertical gardening systems to maximize space.
1.3. Pest and Disease Control
- Indoor cultivation minimizes the risk of pests and diseases that are commonly found in outdoor soil.
- You have greater control over the growing environment, allowing for early detection and prevention of issues.
1.4. Quality Control
- By growing potatoes indoors, you have complete control over the growing conditions and can ensure the use of organic practices.
- You can harvest potatoes that are free from chemical residues and enjoy the freshest, most flavorful tubers.
Setting the Stage: Choosing Your Spud Soldiers
Selecting the Right Seed Potatoes: Not all potatoes are created equal for indoor cultivation. Opt for “seed potatoes,” which are specifically meant for planting, unlike grocery store potatoes that might be treated with sprout inhibitors. Look for disease-resistant varieties like ‘Yukon Gold,’ ‘Red Pontiac,’ or ‘Blue Star,’ known for their compact growth and high yields in containers.
Prepping for Growth: The Art of Chitting: Before planting, encourage your seed potatoes to sprout, a process called “chitting.” Place them in a cool, well-lit location (around 40-50°F) for 4-6 weeks, with the “eyes” (small indentations) facing upwards. Aim for short, stubby shoots, around ½ inch long, as overly long ones become fragile during planting.
Building the Perfect Potato Palace: Choosing Your Container
Container Considerations: While any sufficiently large container with drainage holes will work, consider these factors for optimal potato growing:
- Size: Aim for a container at least 12 inches deep and 18 inches wide. This provides ample space for root development and tuber formation.
- Material: Choose a breathable material like fabric grow bags or plastic pots with adequate drainage holes.
- Number of Plants: Plan for 2-3 seed potatoes per container, allowing enough space for each plant to mature.
Soil Selection: The Foundation of Spud Success: Fill your container with a high-quality, well-draining potting mix. Opt for a mix specifically formulated for vegetables, or create your own by combining equal parts potting soil, compost, and perlite. Ensure the mix is slightly moist but not soggy.
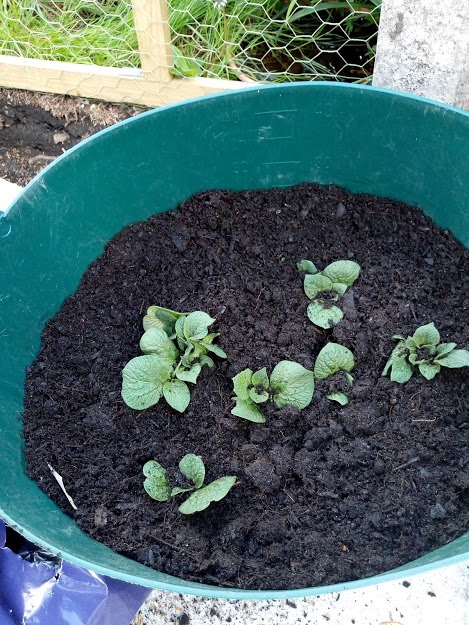
Planting Your Potato Powerhouse: Time to Get Growing!
Planting Process:
- Create Planting Holes: Make 3-4 inch deep holes in the potting mix, spaced evenly around the container.
- Gently Place Seed Potatoes: Carefully place a pre-chitted seed potato, eye-side up, in each hole.
- Cover and Water: Fill the holes with potting mix, leaving about an inch of space at the top. Water the container thoroughly until water runs out the drainage holes.
Sunlight is Key: Potatoes thrive in at least 6-8 hours of bright, indirect sunlight daily. Choose a location near a south-facing window or consider supplementing with grow lights during the winter months.
Nurturing Your Spud Squad: Care and Maintenance
Watering Wisely: Maintain consistent moisture levels in the soil. Water deeply when the top inch of soil feels dry to the touch, allowing excess water to drain freely. Avoid overwatering, as it can lead to root rot.
Feeding for Growth: Once the plants reach about 6 inches tall, you can provide a light feeding with a balanced fertilizer diluted according to the manufacturer’s instructions. Apply fertilizer every 2-3 weeks during the growing season.
Supporting Your Sprouts: As the potato plants grow taller, their stems might require support. Gently insert stakes or tomato cages into the soil next to the plants and loosely tie the stems to the support structure.
The Joy of Harvest: Reaping the Rewards of Your Labor
Signs of Maturity: The telltale signs your potatoes are ready to harvest are:
- Yellowing and dying foliage: This indicates the plant has completed its growth cycle.
- Exposed tubers: As the stems die back, some potatoes might become visible near the soil surface.
Harvesting Your Spuds: Carefully dig up the soil around the base of the plant and gently remove the potatoes. Be mindful not to damage them with sharp tools.
Storing Your Bounty: Store your homegrown potatoes in a cool, dark, well-ventilated location, ideally between 45-50°F, to enjoy their fresh flavor for several weeks.