Peperomia, with their captivating textures and quirky charm, have become a favorite amongst houseplant enthusiasts. But what if you’re a new plant parent, eager to cultivate a thriving little jungle but unsure where to begin? Fear not! This guide is your one-stop shop for everything Peperomia – from understanding their leafy desires to troubleshooting common woes. Let’s embark on the Peperomia Project together and transform your space into a verdant sanctuary.
Getting to Know Your Peperomia
Peperomia hail from the tropics and subtropics of South America, making them accustomed to dappled sunlight filtering through the rainforest canopy. These little dynamos come in a staggering variety, boasting over 1,000 known species! From the rippled, heart-shaped leaves of the Watermelon Peperomia to the coin-like clusters of the Happy Bean, there’s a Peperomia to suit every aesthetic preference.
Peperomia Varieties for Every Fancy
The sheer diversity of Peperomia is truly remarkable. Here’s a glimpse into some popular varieties to inspire your plant journey:
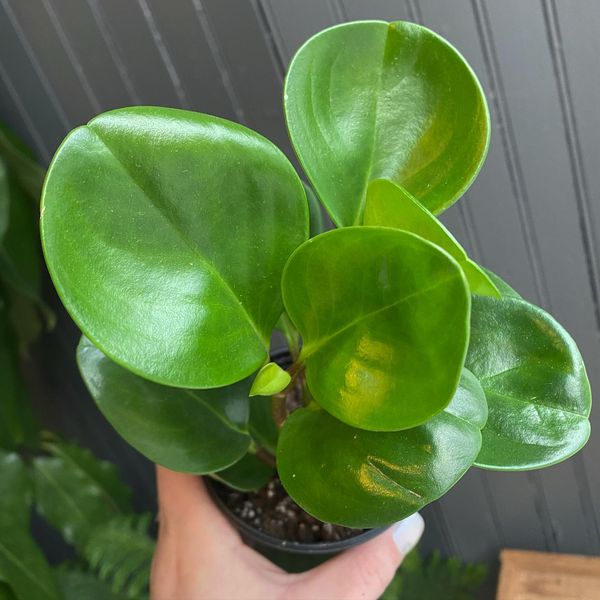
- Peperomia obtusifolia (Baby Rubber Plant): This classic features plump, glossy leaves that resemble miniature rubber plants.
- Peperomia argyreia (Watermelon Peperomia): As the name suggests, this variety boasts stunning variegated leaves with a watermelon rind-like pattern.
- Peperomia rotundifolia (Coin Leaf Peperomia): This charming Peperomia sports clusters of round, coin-shaped leaves, adding a touch of whimsy to any space.
- Peperomia perfoliata (Raindrop Peperomia): This unique variety features fleshy, tear-drop shaped leaves that seem to cascade down the stems.
Unboxing Your Peperomia
So, you’ve brought home your very own Peperomia! Here’s how to ensure a smooth transition:
- Give it a light bath: Gently remove any debris from the leaves with a damp cloth.
- Find the perfect spot: Bright, indirect sunlight is key. Avoid harsh afternoon rays that can scorch the leaves.
- Check the soil moisture: Most Peperomia prefer their soil to dry slightly between waterings. Stick your finger into the top inch of soil – if it feels dry, it’s watering time!
Setting Up Your Peperomia for Success
Now that you’ve gotten acquainted, let’s create an environment where your Peperomia can truly flourish.
Light
Imagine sunlight dappling through leaves on the forest floor – that’s the kind of light your Peperomia craves. An east-facing window is ideal, offering gentle morning sun. South or west-facing windows might require filtering the light with sheer curtains to prevent scorching. While Peperomia can tolerate lower light conditions, growth might be slower, so be mindful of placement.
Water
Here’s where the “less is more” approach applies. Overwatering is the arch-nemesis of Peperomia, leading to root rot and wilting leaves. The key is to water deeply when the top inch of soil feels dry, allowing excess water to drain freely from the pot. Avoid leaving your Peperomia sitting in water – empty the drainage tray after watering.
Soil
Think well-draining and airy! A good quality cactus or succulent mix is perfect. You can also create your own by combining regular potting mix with perlite or coarse sand for added drainage.
Potting
Peperomia are slow growers and prefer being slightly root-bound. Choose a pot that’s just an inch or two larger than the root ball. Opt for terracotta pots as they allow for better airflow and prevent root rot.
Pro Tip: Repotting is typically only necessary every 2-3 years, or when roots start pushing out of the drainage holes.
Peperomia Power-Ups: Keeping Your Plant Happy
While Peperomia are relatively low-maintenance plants, a few extra TLC gestures can go a long way:
- Fertilizer: During the growing season (spring and summer), a diluted liquid fertilizer application once a month can give your Peperomia a boost. Opt for a balanced fertilizer formulated for houseplants.
- Humidity: While Peperomia don’t require extremely high humidity levels, dry indoor air, especially during winter, can take a toll. Grouping your Peperomia with other plants or placing a pebble tray filled with water near the pot can help increase humidity.
Troubleshooting Common Peperomia Problems
Even the most dedicated plant parent might encounter a bump in the road. Here’s how to address some common Peperomia issues:
- Droopy leaves: This is usually a sign of overwatering. Reduce watering frequency and allow the soil to dry completely between waterings.
- Yellowing leaves: This could be due to underwatering, excessive light, or natural leaf aging. Check the watering schedule and adjust if necessary. If the affected leaves are near a light source, move the plant to a shadier spot.
- Leggy growth: This indicates insufficient light. Move your Peperomia to a brighter location.
The Joys of Peperomia Propagation
Once you’ve mastered the art of Peperomia care, you might find yourself wanting to expand your tiny plant empire. The good news is, Peperomia are quite easy to propagate! Here are
Here are two popular propagation methods for Peperomia:
- Leaf cuttings: Select healthy leaves with a short stem attached. Dip the cut end in rooting hormone (optional) and plant it in a pot filled with a well-draining potting mix. Keep the soil moist but not soggy and place the pot in a warm location with indirect light. Patience is key – it can take several weeks for roots to develop.
- Stem cuttings: Choose a healthy stem with a few nodes (leaf junctions). Cut the stem just below a node and remove the lower leaves. Plant the stem in a pot filled with a well-draining potting mix, ensuring a node is buried beneath the soil surface. Water lightly and follow the same care instructions as for leaf cuttings.
Pro Tip: Covering the pot with a clear plastic bag (creating a mini greenhouse) can help retain moisture and promote rooting. Just remember to remove the bag occasionally for air circulation to prevent rot.