Lavender, with its calming fragrance and elegant purple blooms, is a beloved addition to any patio or balcony. But did you know this Mediterranean marvel thrives just as well in pots as it does in sprawling fields? This guide will unveil the secrets to cultivating a flourishing pot of lavender, transforming your container into a fragrant and low-maintenance oasis.
This post may have affiliate links. This means that sometimes when you click a link on our site and make a purchase on Amazon, we may earn a small commission at no additional cost to you. We only recommend products we truly believe in, and your support helps keep us running!
Choosing Your Lavender Suited For Pots
Here are some star performers specifically suited for pots:
- English Lavender (Lavandula angustifolia): This classic choice boasts a compact growth habit and intense fragrance, making it ideal for smaller containers.
- French Lavender (Lavandula dentata): This showstopper offers larger, broader blooms and a more robust presence in pots.
- Munstead Lavender (Lavandula x intermedia ‘Munstead’): This award-winner is known for its long flowering season and delightful aroma, making it a fantastic pot choice.
Seed or Transplant?
While starting lavender from seed is certainly an option, it requires a bit more patience and isn’t ideal for instant gratification. Opting for a healthy young lavender plant from your local nursery allows you to enjoy blooms within the first year.
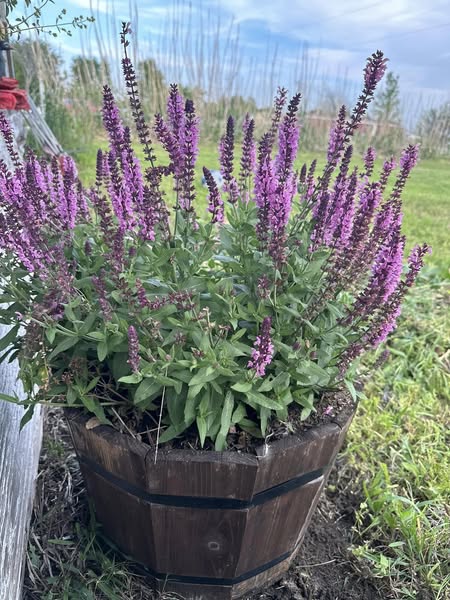
Crafting the Perfect Pot Palace
Sun-drenched Sanctuary: Lavender craves sunshine. Choose a pot that will receive at least 6-8 hours of direct sunlight daily. Terracotta pots are a great choice, as their porous nature allows for good drainage and breathability for the roots.
Drainage is King: Soggy roots are lavender’s worst enemy. Ensure your pot has ample drainage holes. Consider placing a layer of gravel or broken pottery shards at the bottom of the pot to further improve drainage.
Choosing the Right Soil: Standard potting mix often retains too much moisture for lavender. Instead, create a well-draining mix by combining:
- 2 parts potting soil
- 1 part sharp sand
- 1 part perlite or pumice
This blend provides essential drainage while offering enough nutrients for your lavender to thrive.
Planting Your Lavender Champion
- Gently remove your lavender plant from its nursery pot.
- Loosen any tightly bound roots to encourage healthy growth.
- Place the plant in your chosen pot, ensuring the crown (the point where the stem meets the roots) sits slightly above the soil level.
- Backfill the pot with your prepared soil mix, gently firming it around the base of the plant.
- Water thoroughly until water runs freely from the drainage holes.
Nurturing Your Fragrant Friend
Watering Wisely: Lavender thrives on neglect when it comes to watering. Allow the soil to dry completely between waterings. Stick your finger into the soil; if the top inch feels dry, it’s time to water deeply.
Sun Salutations: Remember, sunshine is key! Rotate your pot regularly to ensure all sides of the plant receive sufficient sunlight for even growth.
Don’t Overfeed the Beast: Lavender is not a heavy feeder. A light application of a balanced fertilizer once during spring is sufficient.
Strategic Snipping: Regularly deadheading (removing spent blooms) encourages continuous flowering throughout the season. Don’t be shy – the more you prune, the bushier your lavender will become. Aim to cut just below the flower head, taking a small section of the stem with it.
Winter Woes?
For gardeners in colder climates (USDA zones 7 and below), winter protection is crucial for non-hardy lavender varieties. Before the first frost, here are a few options:
- Move your pot indoors: A cool, sunny location (like a sunroom or unheated garage) is ideal. Water sparingly during the winter months.
- Mulch it Up: Apply a layer of mulch (such as straw or pine needles) around the base of the plant to insulate the roots. Ensure the mulch doesn’t touch the stem directly.
- Wrap it Snug: In very cold regions, consider wrapping the pot loosely with burlap or frost protection fabric for added insulation.
The Rewards of Your Royal Lavender
With proper care, your potted lavender will reward you with years of fragrant blooms and beautiful foliage. Here are some bonus tips to get the most out of your fragrant friend:
- Companion Planting: Lavender attracts beneficial pollinators like bees and butterflies. Consider planting herbs like thyme or oregano alongside your lavender to create a vibrant pollinator haven.
- Harvesting: Once the blooms are fully open, cut the stems just below the flower head. Lavender can be dried for potpourri, sachets, or culinary uses.
Rejuvenating Your Regal Lavender
While lavender is a relatively low-maintenance plant, a little occasional renewal can keep your potted specimen looking its best for years to come. Here’s how to tackle this task:
The Pruning Powerhouse: Every few years (typically after 3-4 years of growth), consider giving your lavender a rejuvenating prune. This encourages bushier growth and promotes continued flowering. The ideal time for this procedure is in late winter or early spring, just before new growth appears.
- Sharpen Your Shears: Use sharp pruning shears or secateurs to make clean cuts.
- Fear Not the Chop: Don’t be afraid to cut back the woody stems by about one-third to one-half their length. This may seem drastic, but it will stimulate new growth at the base of the plant.
- Shaping Up: Use this opportunity to remove any dead, diseased, or crossing branches to improve the overall shape of your lavender.
Repotting Rhapsody:
Over time, the roots of your lavender may outgrow its current pot. Repotting every 3-5 years allows you to provide fresh soil and prevent the plant from becoming rootbound. Here’s how to handle this:
- Choosing the New digs: Select a pot that’s 2-3 inches larger in diameter than the current one. Ensure it has good drainage holes.
- Gently Does It: Carefully remove the lavender from its current pot. Loosen any tightly bound roots with your fingers.
- Soil Refresh: Discard the old potting mix and replace it with your well-draining mix (2 parts potting soil, 1 part sand, 1 part perlite/pumice).
- Settling In: Place the lavender in the new pot, ensuring the crown sits slightly above the soil level. Backfill with fresh potting mix and water thoroughly.
Troubleshooting Your Fragrant Favorite
Lackluster Blooms: Sparse flowering is often a sign of insufficient sunlight or inadequate pruning. Ensure your lavender receives at least 6-8 hours of direct sunlight daily and practice regular deadheading throughout the season.
Leggy Growth: This can be caused by insufficient light. Move your pot to a sunnier location and prune regularly to encourage bushier growth.
Brown or Yellow Leaves: Overwatering is the culprit here. Allow the soil to dry completely between waterings and adjust your watering frequency accordingly.
Signs of Distress: If you notice signs of pests like aphids or whiteflies, use an organic insecticidal soap solution to manage the infestation.