Garlic is the pungent protagonist of countless dishes, the silent weapon against vampires (or so legend says), and a surprisingly easy crop to grow at home. But for the novice gardener, the question of harvest can be a source of anxiety. How do you know when your garlic is ready? And more importantly, how do you harvest it before it goes rogue and bursts forth from the soil in a flurry of cloves?
This guide will equip you with the knowledge to unearth perfectly formed bulbs, brimming with flavor and ready to elevate your culinary creations.
When Your Garlic Says “It’s Time”: Signs of Harvest Readiness
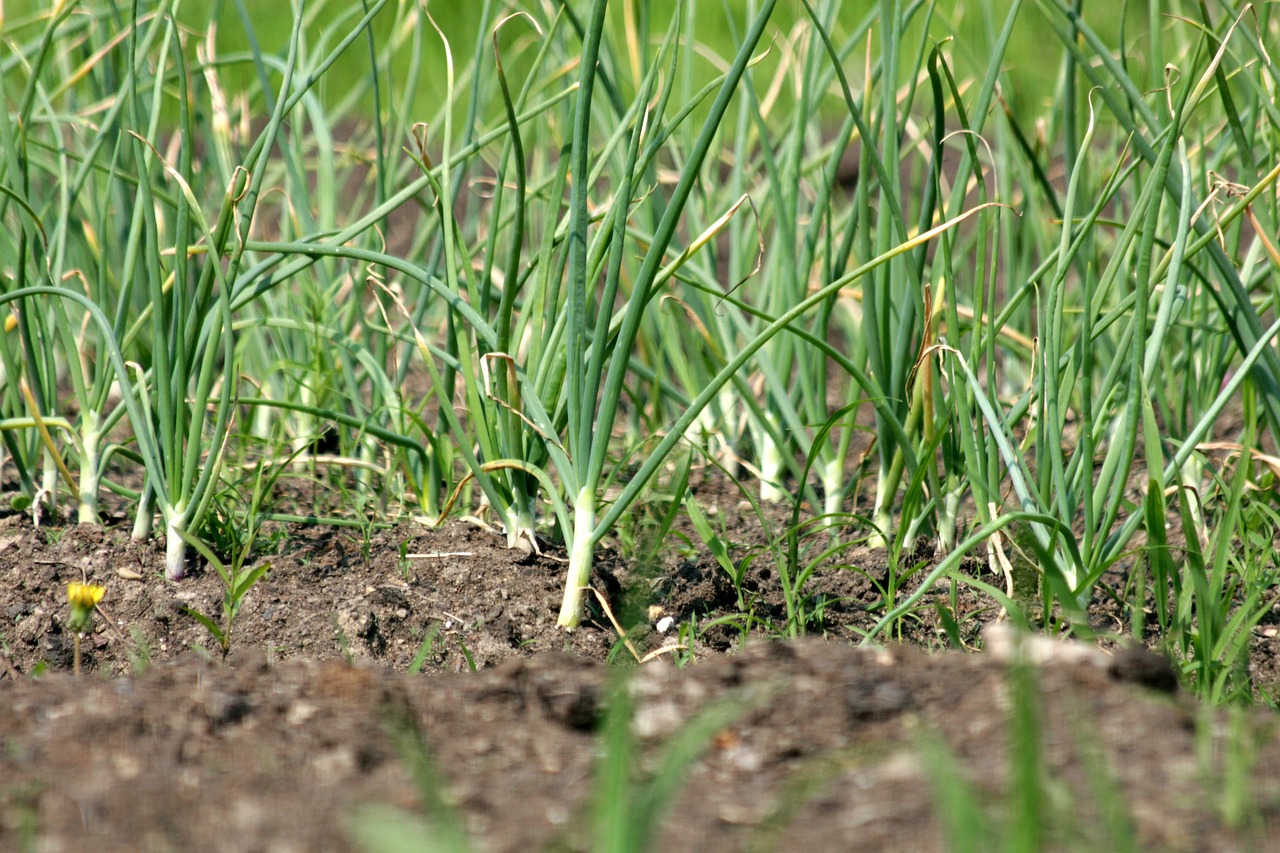
Unlike its flamboyant cousin, the onion, garlic won’t announce its readiness with a triumphant emergence from the ground. Instead, it relies on subtle signals from its foliage. Here’s what to keep an eye out for:
- The Lower Leaf Lottery: Garlic leaves are like a countdown timer. As the plant matures, the lower leaves will begin to yellow and brown at the tips, eventually dying back completely. This is a good sign! It indicates that the bulb is putting its energy into developing plump cloves underground. However, you don’t want to wait until all the leaves are brown. Aim for a sweet spot where the lower 2-3 leaves have succumbed to the browning process, while the upper half remains green and healthy.
- The Twist Test (Optional): This method is for the particularly eager harvester (or the indecisive one!). Carefully (and gently!) loosen the soil around a single plant. If the bulb feels firm and resists some wiggling, it’s likely ready. However, if it feels loose and easily rotates, it probably needs a bit more time to develop. Remember, patience is a virtue, especially when it comes to harvesting those robust garlic cloves.
Pro Tip: Don’t be afraid to sacrifice a curious soul. Gently excavate one plant as a test subject to gauge the overall development of your garlic crop. This will give you a good idea of when the majority of the bulbs are ready for harvest.
The Art of the Harvest: Unearthing Your Garlic Treasure
Now that you’ve identified the signs, it’s time to get your hands dirty (literally) and liberate those glorious garlic bulbs. Here’s what you’ll need:
- A trusty garden fork: This will be your tool of choice for gently loosening the soil around the garlic plants.
- A hand trowel: Useful for carefully digging and maneuvering around the bulbs.
- A basket or bucket: For collecting your freshly harvested garlic bounty.
Step 1: Loosen Up the Ground:
Using your garden fork, carefully loosen the soil around the base of the garlic plant. Be gentle – you don’t want to damage the precious bulbs lurking beneath.
Step 2: Embrace the Trowel:
Once the soil is loosened, employ your hand trowel to carefully dig down and expose the top of the garlic bulb. Remember, you’re not looking to unearth the entire root system – just enough to get a good grip on the bulb.
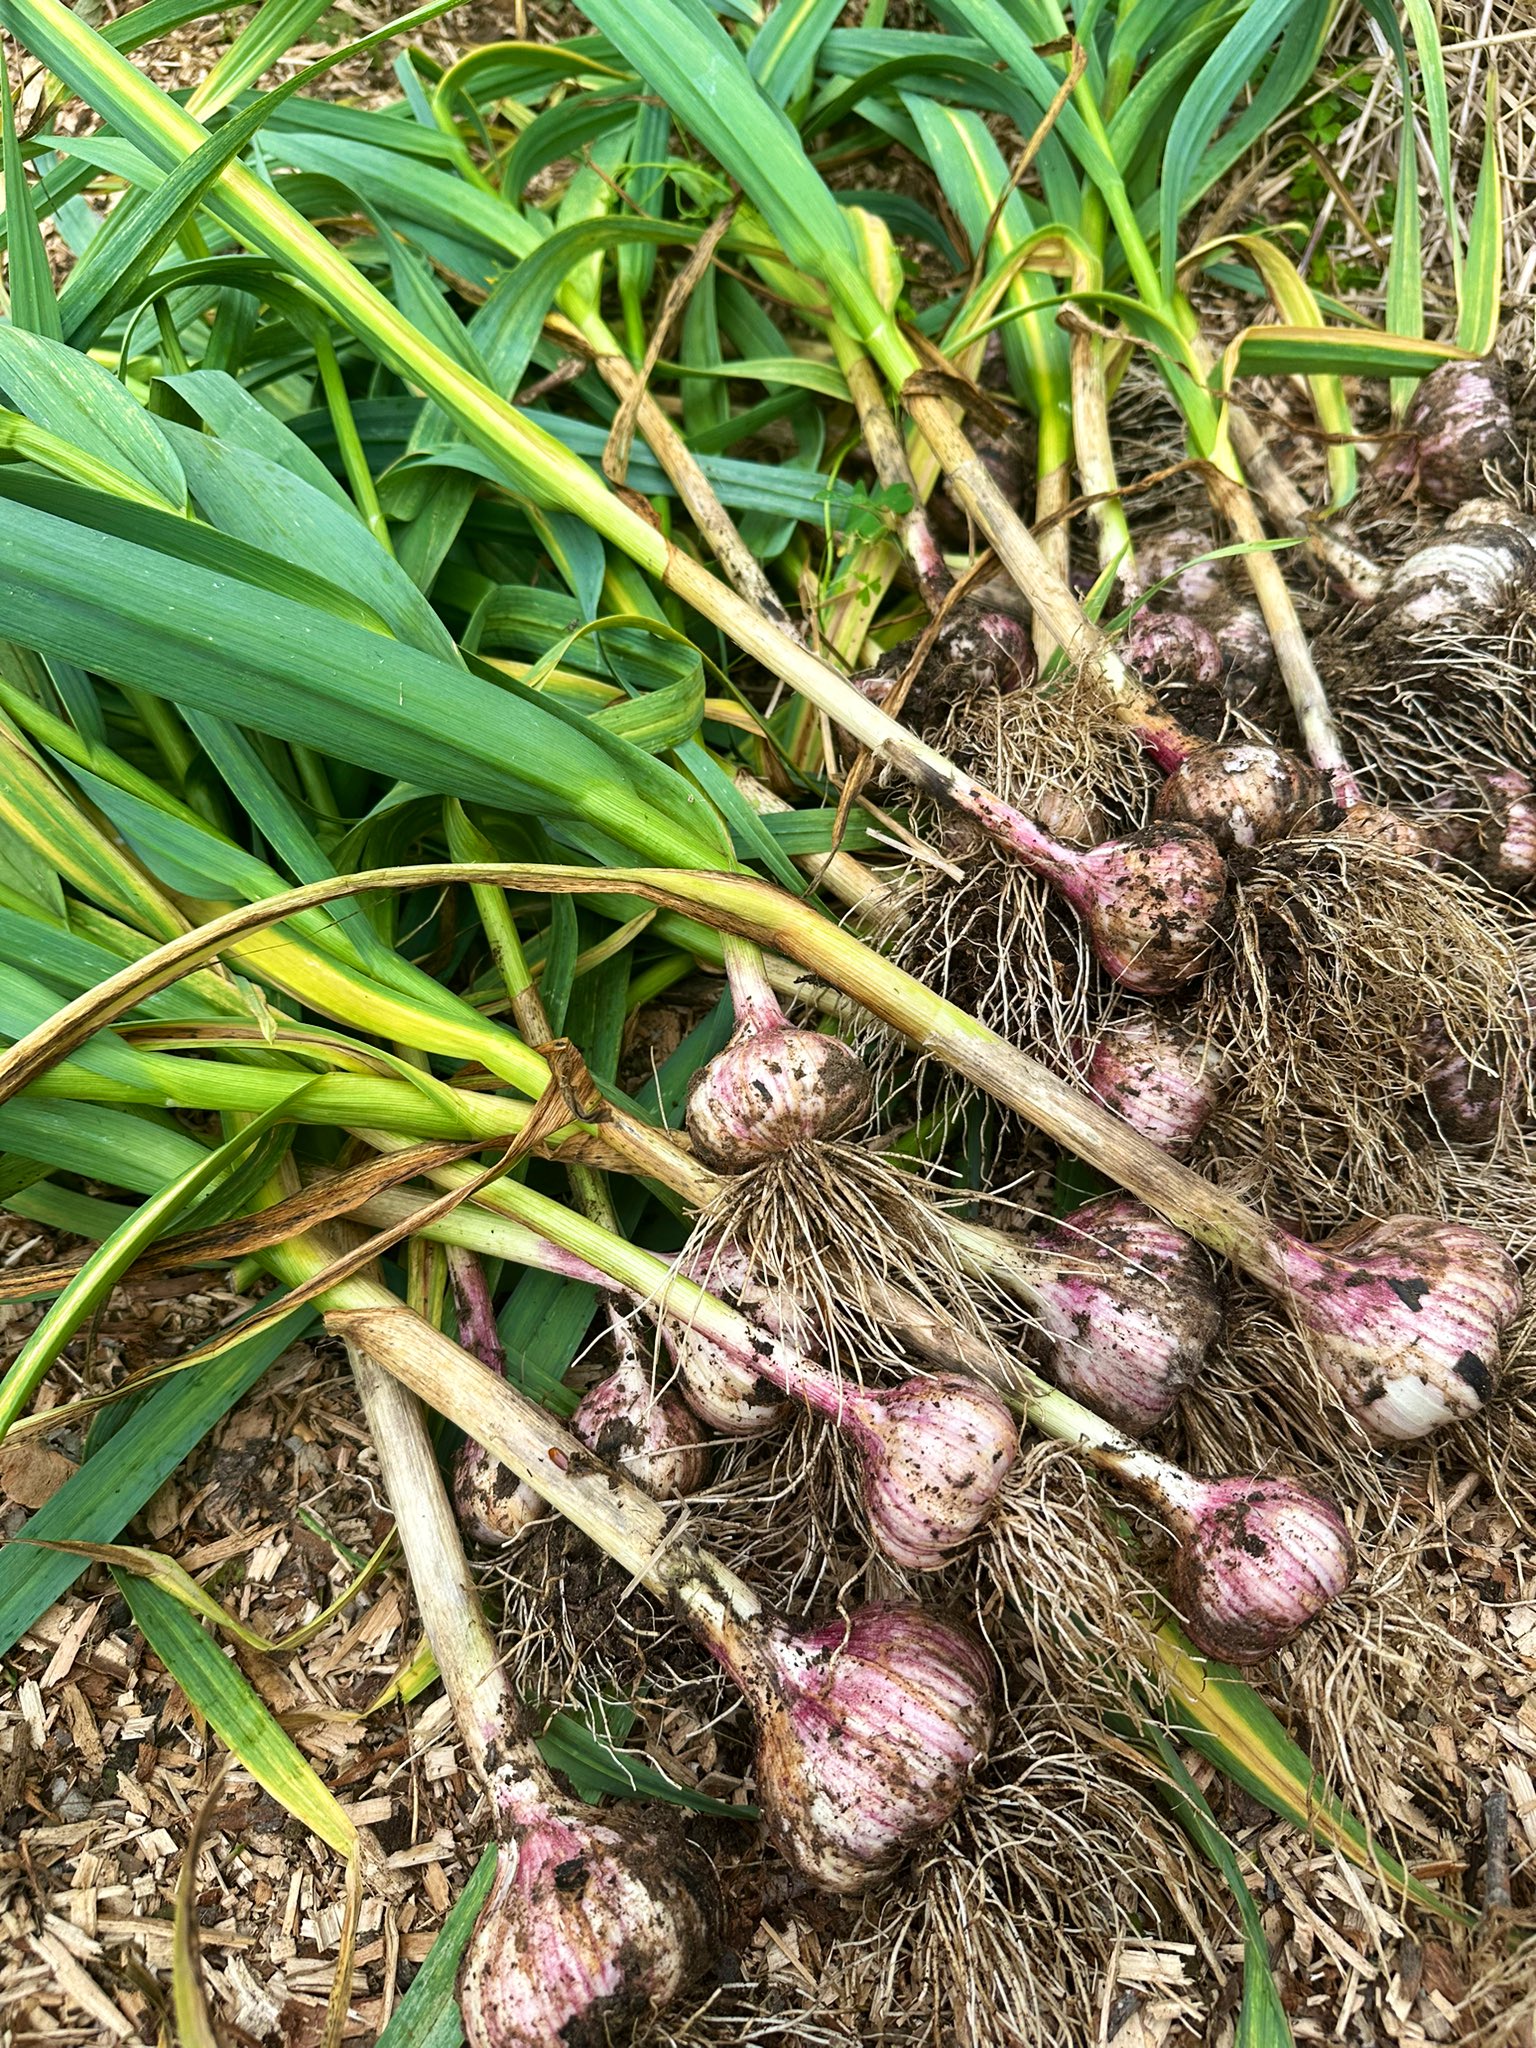
Step 3: The Gentle Lift:
Grip the base of the garlic bulb firmly and gently lift it from the soil. Be mindful of the roots – you can trim them later.
Step 4: Let the Sunshine In (Optional):
If the weather permits, you can spread your harvested garlic in a single layer on a sunny, well-ventilated spot in your garden for a day or two. This allows the bulbs to dry out slightly before the curing process. However, if rain or heavy dew is on the horizon, skip this step and move straight to curing.
Curing Your Garlic: The Final Frontier
Now that your garlic bulbs are out of the ground, it’s time to prepare them for long-term storage. This process, known as curing, is essential for developing the robust flavor and papery skin that allows garlic to store for months. Here’s how to do it:
- Find a Cool, Dry, and Well-Ventilated Spot: Your attic, garage, or a screened-in porch can be ideal curing locations. The key is to ensure good air circulation to prevent mold growth.
- Trim the Stems and Roots: Using sharp pruners, cut the stem back to about 1 inch above the bulb. You can also trim the roots to about ½ inch.
- Leave the Tops On (For Softneck Varieties): If you’re growing softneck garlic, you can leave 2-3 inches of the green tops on. These will braid beautifully for storage and add a decorative touch to your kitchen. However, for hardneck varieties, remove most of the green tops, leaving just a stub above the bulb.
- Braid Away (Optional): For softneck garlic, this is the fun part! Separate the bulbs from the remaining stem and braid them together using the leftover green tops. This traditional method not only looks fantastic hanging in your kitchen but also promotes good air circulation.
- Spread Them Out: If braiding isn’t your thing, or you’re dealing with hardneck garlic, simply spread the bulbs out in a single layer on a mesh screen or breathable fabric. Ensure there’s enough space between each bulb for proper airflow.
Curing Time: The curing process typically takes 2-4 weeks, depending on the humidity and temperature. Ideally, you want the temperature to be around 60-70°F (15-21°C) with a relative humidity of around 60%.
Checking In: During the curing period, it’s wise to check on your garlic every few days. Discard any bulbs that show signs of rot or softening.
Storing Your Garlic Bounty: The Grand Finale
Once your garlic is fully cured, it’s ready to be stored for long-term use. Here are some tips for maximizing its shelf life:
- Keep it Cool and Dry: Find a cool, dark, and dry place to store your garlic. A pantry, a mesh bag hung in a cool basement, or a well-ventilated cupboard are all good options. Avoid storing garlic near heat sources like ovens or stoves.
- Separate is the Name of the Game: Don’t store your garlic with other vegetables like potatoes or onions. These vegetables release ethylene gas, which can accelerate the sprouting of your garlic.
- Embrace the Basket: Breathable containers like baskets or mesh bags are ideal for storing garlic. Avoid using airtight containers, as they can trap moisture and promote spoilage.