In today’s world, sustainable gardening practices have become more crucial than ever. As we strive to reduce waste and protect our environment, repurposing plastic bottles for gardening has emerged as an innovative solution. Growing vegetables in plastic bottles not only allows us to utilize discarded materials but also offers numerous benefits for both the environment and our own well-being.
In this comprehensive guide, we will explore the exciting world of plastic bottle gardening and how it can transform your space into a bountiful garden. We will delve into the basics of plastic bottle gardening, including selecting suitable bottles, preparing them for planting, and creating an ideal soil mix. Furthermore, we will discuss the process of planting and caring for vegetables in plastic bottles, emphasizing watering, nutrient management, and pest control techniques.
As we progress, we will also address the joy of harvesting fresh vegetables from your plastic bottle garden and the culinary delights that await you. Additionally, we will touch upon the environmental impact of plastic waste and the significance of repurposing materials for sustainable practices.
By the end of this guide, you will not only be equipped with the knowledge to embark on your own plastic bottle gardening journey but also inspired to contribute to a greener and more sustainable world.
Now, let’s dive into the fascinating realm of transforming plastic bottles into abundant gardens!
Table of Contents
Section 1: Getting Started Growing Vegetables In Plastic Bottles
Understanding the Basics
Plastic bottle gardening is a creative and sustainable gardening technique that involves repurposing plastic bottles as containers for growing plants. Rather than discarding these bottles as waste, they can be transformed into functional and eco-friendly planters.
Explanation of the concept of plastic bottle gardening
Plastic bottle gardening harnesses the potential of everyday plastic bottles to create a versatile and accessible gardening solution. By cutting and modifying the bottles, they can be transformed into individual planting containers, providing a controlled environment for plants to thrive.
Advantages Of Plastic Bottle Gardening
- Accessibility: Plastic bottles are readily available and cost-effective, making them an accessible option for gardening enthusiasts, regardless of space constraints or budget.
- Mobility: Plastic bottle gardens are portable, allowing you to move them around as needed to optimize sunlight exposure or protect plants from adverse weather conditions.
- Water conservation: Plastic bottles can be designed to facilitate efficient watering, reducing water waste and promoting water conservation.
- Upcycling: By repurposing plastic bottles, this technique contributes to waste reduction and promotes sustainability by giving a new life to materials that would otherwise end up in landfills or pollute the environment.
Limitations:
- Limited root space: The size of the plastic bottles restricts the root space available for plants, which may affect the growth potential of certain vegetable varieties.
- Susceptibility to extreme temperatures: Plastic containers can amplify temperature fluctuations, which may require extra care in extreme weather conditions to protect plants from heat stress or cold damage.
- Maintenance: Plastic bottles may require regular monitoring and maintenance, including pruning, watering, and pest control, to ensure optimal plant growth.
Selecting Suitable Bottles For Growing Vegetables In Plastic Bottles
When embarking on your plastic bottle gardening journey, it is important to choose the right types of plastic bottles that are suitable for gardening purposes. Consider the following factors when selecting bottles:
Identifying the right types of plastic bottles for gardening
Not all plastic bottles are suitable for gardening. It is essential to identify bottles made of food-grade plastic, as they are free from harmful chemicals and safe for growing edible plants. Look for bottles with recycling codes #1 (PET) and #2 (HDPE), as these are commonly considered safe for gardening applications.
Factors to consider when choosing bottles
Size:
- Consider the size of the plant you intend to grow. Smaller plants, such as herbs or lettuce, can thrive in smaller bottles, while larger vegetables, like tomatoes or peppers, require more space and thus need larger bottles.
- Ensure that the bottle provides adequate root space for the plants to grow and develop.
Material:
- Opt for bottles made of thick and durable plastic. These will withstand the weight of the soil and the pressure exerted by growing plants.
- Avoid using thin or flimsy bottles, as they may deform or collapse under the weight and stress.
Transparency:
- Transparent or semi-transparent bottles allow sunlight to reach the roots, promoting photosynthesis and healthy plant growth.
- However, if you choose opaque bottles, you can still create an effective plastic bottle garden by ensuring proper lighting conditions for the plants.
Upcycling ideas for different types of bottles
Plastic bottles come in various shapes and sizes, providing opportunities for creative upcycling in your garden. Consider these ideas for repurposing different types of bottles:
- 2-liter soda bottles: These large bottles are ideal for growing larger plants, such as tomatoes or peppers. Cut them near the middle, leaving the bottom part as the planting container and using the top part as a protective cover or mini greenhouse.
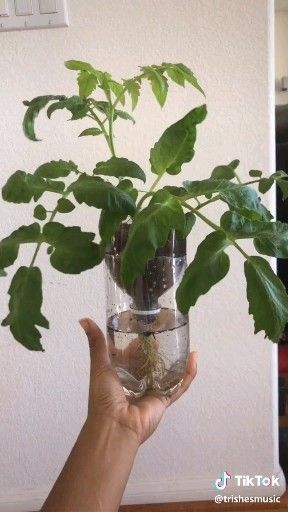
- Water bottles: Smaller water bottles, like 500ml or 1-liter sizes, are suitable for growing herbs, lettuce, or smaller vegetables. Cut them near the top, invert them, and use the inverted top part as a water reservoir while the bottom part acts as the planting container.
- Milk or juice bottles: These bottles can be repurposed as vertical gardens by cutting them into multiple sections and stacking them one on top of another. The bottom part of each bottle serves as a planting container, allowing you to grow multiple plants in a small vertical space.
- Plastic jugs: Large plastic jugs, such as those used for laundry detergent or bleach, can be transformed into self-watering containers. Cut them near the bottom, invert the top part, and insert it back into the jug. This creates a reservoir for water, allowing the plants to self-water as needed.
Preparing the Bottles
To ensure the success of your plastic bottle garden, it is essential to properly clean, sterilize, and prepare the bottles before using them as planting containers. Follow these steps to prepare the bottles effectively:
Step-by-step guide on cleaning and sterilizing bottles
- Start by removing any labels or stickers from the bottles. Soak them in warm water and scrub off any residue using a sponge or scrub brush.
- Prepare a cleaning solution by mixing warm water with mild dish soap or a small amount of bleach. Ensure proper ventilation if using bleach.
- Submerge the bottles in the cleaning solution and let them soak for a few minutes. Use a bottle brush or a long-handled brush to scrub the insides thoroughly.
- Rinse the bottles with clean water to remove any soap or bleach residue.
- To sterilize the bottles, you have several options:
- Boiling method: Place the bottles in a large pot filled with water and bring it to a boil. Let the bottles boil for 5 to 10 minutes to kill any remaining bacteria or pathogens. Remove the bottles using tongs and let them air dry.
- Vinegar method: Fill the bottles with white vinegar and let them sit for 10 to 15 minutes. Empty the vinegar and rinse the bottles with water. Allow them to air dry.
- Dishwasher method: If your dishwasher has a high-temperature or sterilization setting, place the bottles on the top rack and run a cycle with hot water.
- Once the bottles are dry and sterilized, they are ready for the next step of cutting and preparing them for planting.
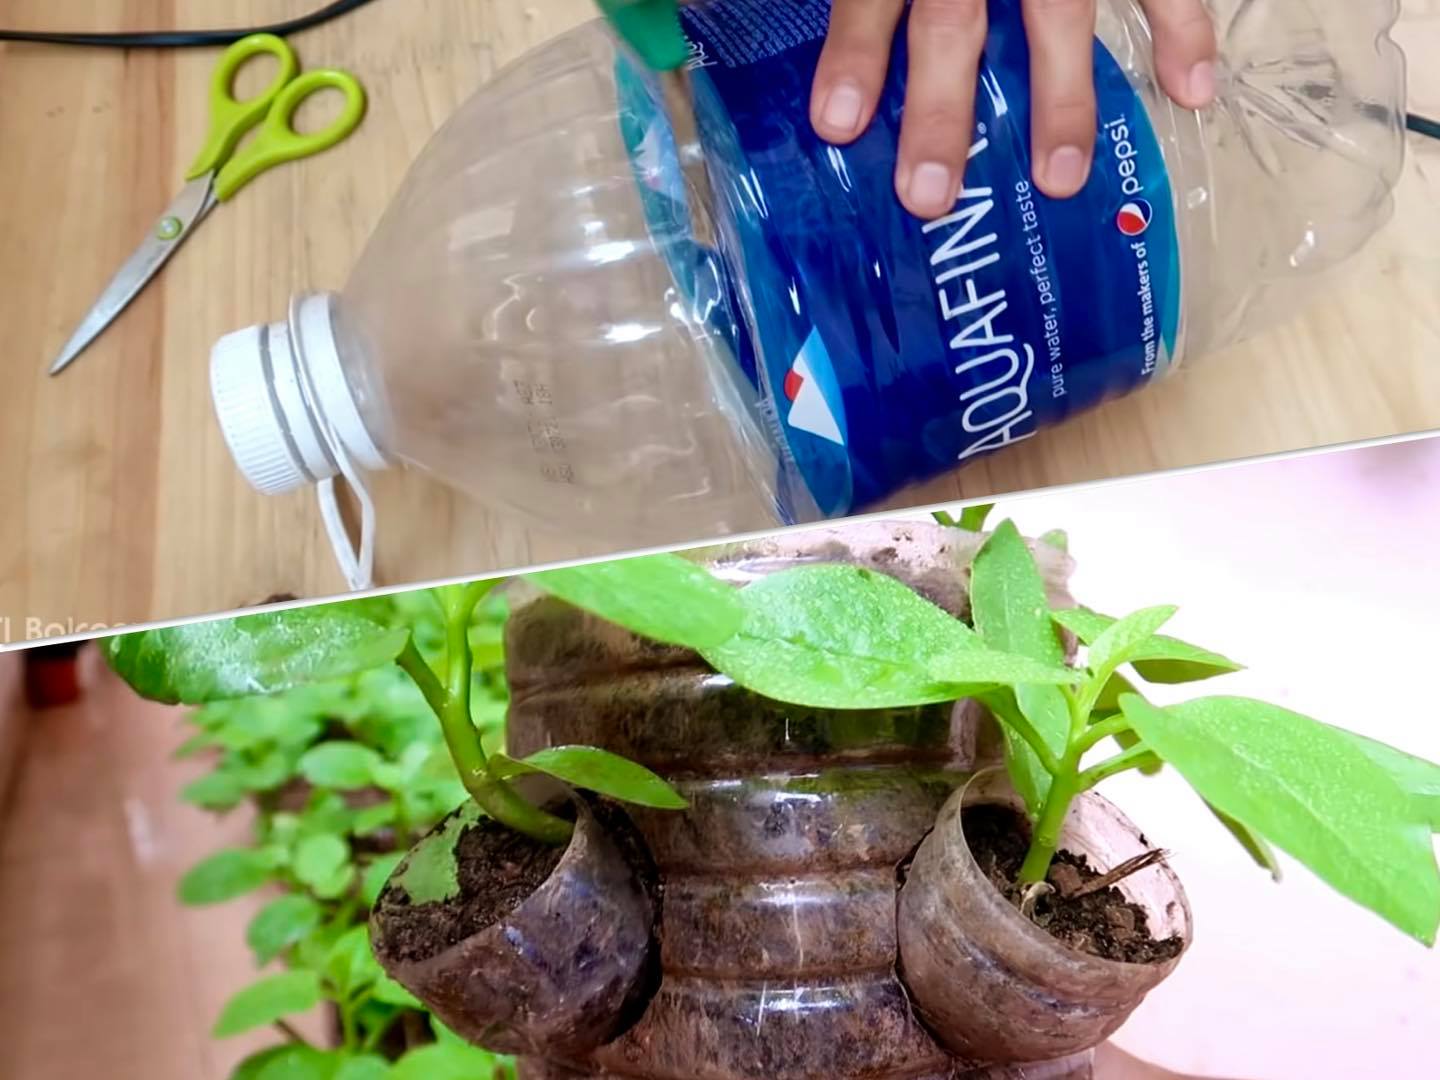
Techniques for cutting bottles to create planting containers
Cutting the bottles correctly is crucial to create functional planting containers. These are ways you can cut the bottle:
Vertical cutting method:
- Mark a line on the bottle where you want to make the cut. For smaller plants, a few inches above the bottom may suffice, while larger plants may require cutting closer to the top.
- Use a sharp utility knife or scissors to carefully cut along the marked line. Take your time and make a steady, even cut to ensure a smooth edge.
- Once the cut is complete, you will have two separate parts: the bottom portion as the planting container and the top portion, which can be used as a protective cover or mini greenhouse.
Horizontal cutting method:
- Mark a line around the circumference of the bottle, creating two sections of the desired height. For vertical gardening, you can mark multiple lines to create several sections.
- Make a small cut at the starting point of the marked line.
- Use scissors or a sharp knife to cut along the marked line, applying gentle and even pressure.
- Repeat the process for each marked line to create multiple sections.
- Stack the sections on top of each other, starting with the bottom part acting as the planting container and the subsequent sections providing additional growing space.
Tools and equipment required for bottle preparation
To prepare the bottles, gather the following tools and equipment:
- Utility knife or scissors: These will be used for cutting the bottles. Make sure they are sharp and suitable for cutting plastic.
- Bottle brush or long-handled brush: This will aid in cleaning the bottles thoroughly.
- Large pot: If you choose the boiling method for sterilization, a pot large enough to accommodate the bottles is necessary.
- Tongs: Use tongs to handle the bottles when removing them from boiling water.
- Sponge or scrub brush: These are useful for removing labels and residue from the bottles.
- Vinegar or mild dish soap: These are cleaning agents for removing dirt and grime from the bottles.
- Optional: Dishwasher with a sterilization or high-temperature setting, which can be used instead of boiling or vinegar methods.
Soil Mix and Drainage
Creating the right soil mix and ensuring proper drainage are vital aspects of successful plastic bottle gardening. Here we will explore suitable soil mixes, methods for improving drainage, and tips for selecting appropriate fertilizer and amendments for your plastic bottle containers.
Exploring suitable soil mixes for growing vegetables in plastic bottles
Container gardening requires a well-draining and nutrient-rich soil mix to support plant growth. Consider the following components for a suitable soil mix:
- Potting soil: Use a high-quality commercial potting soil as the base of your mix. Potting soil provides a good balance of drainage and water retention.
- Compost: Incorporate compost into the soil mix to enrich it with organic matter and essential nutrients.
- Perlite or vermiculite: These materials improve aeration and drainage in the soil mix. They help prevent compaction and ensure sufficient oxygen reaches the roots.
- Coarse sand: Adding coarse sand in small amounts can enhance drainage, especially if the potting soil is heavy and retains excess moisture.
- Optional amendments: Depending on the specific needs of your plants, you can include amendments such as peat moss, coconut coir, or well-rotted manure to further improve water retention, structure, and nutrient content.
Experiment with different ratios to find a soil mix that suits your plants’ requirements and provides optimal growth conditions.
Methods for improving drainage in plastic bottle containers
Drainage is crucial in plastic bottle containers to prevent waterlogging, which can lead to root rot and other moisture-related issues. Here are some methods to improve drainage:
- Create drainage holes: Using a sharp knife or a heated nail, carefully create several small drainage holes at the bottom of the plastic bottle container. Ensure the holes are large enough to allow excess water to escape but small enough to prevent soil from falling out.
- Layer of gravel or small rocks: Place a layer of small rocks or gravel at the bottom of the bottle before adding the soil mix. This layer helps facilitate water drainage and prevents soil from clogging the drainage holes.
- Elevate the containers: Raise the plastic bottle containers slightly off the ground using bricks, blocks, or a raised platform. This elevation allows excess water to flow freely from the drainage holes.
Tips for selecting appropriate fertilizer and amendments
To provide your plants with essential nutrients, consider the following tips when selecting fertilizers and amendments:
- Organic fertilizers: Opt for organic fertilizers to promote soil health and sustainability. Organic options include well-rotted compost, worm castings, or commercially available organic fertilizers. These fertilizers release nutrients slowly and improve soil structure over time.
- Balanced nutrient composition: Look for fertilizers with a balanced NPK (nitrogen, phosphorus, and potassium) ratio to meet the specific needs of your plants. The ratio may vary depending on the plant’s growth stage, so adjust accordingly.
- Slow-release fertilizers: Consider using slow-release fertilizers in granular or pellet form. These provide a gradual and consistent release of nutrients over an extended period, reducing the frequency of fertilization.
- Micronutrient supplements: Some plants may require additional micronutrients, such as iron, magnesium, or calcium. Check for specific nutrient deficiencies and provide targeted supplements if necessary.
Before adding any amendments or fertilizers, it is recommended to conduct a soil test to determine the existing nutrient levels and pH of your soil. This will help you tailor the amendments and fertilizers to the specific needs of your plants.
Section 2: Planting and Caring for Vegetables in Plastic Bottles
Choosing the Right Vegetables
Selecting the right vegetables is key to successful plastic bottle gardening. Not all vegetables are well-suited for container gardens, so it’s important to choose varieties that thrive in confined spaces. Consider the following recommendations, factors, and tips when selecting vegetables for your plastic bottle garden:
Recommendations for vegetables that thrive in container gardens
- Leafy greens: Lettuce, spinach, kale, and Swiss chard are excellent choices for container gardens. They have shallow root systems and can be harvested continuously for a continuous supply of fresh greens.
- Herbs: Basil, parsley, cilantro, mint, and chives are compact herbs that grow well in containers. They add flavor and aroma to your dishes while requiring minimal space.
- Radishes: Radishes are quick-growing root vegetables that are well-suited for container gardens. They have shallow roots and can be harvested within a few weeks.
- Tomatoes: Compact and determinate tomato varieties, such as cherry or patio tomatoes, are suitable for container gardening. Look for varieties specifically bred for small spaces and container growth.
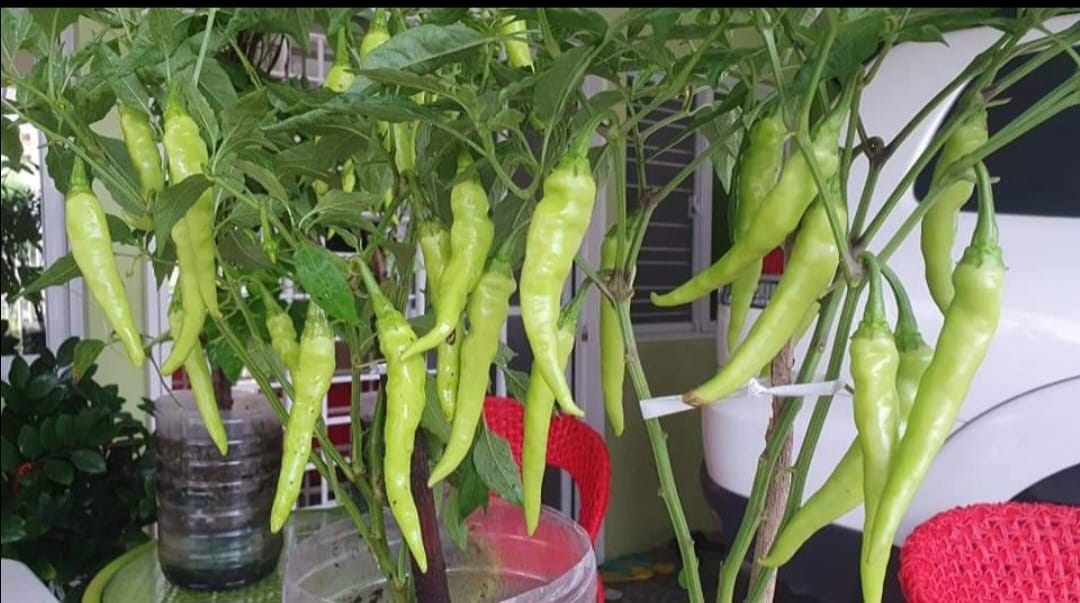
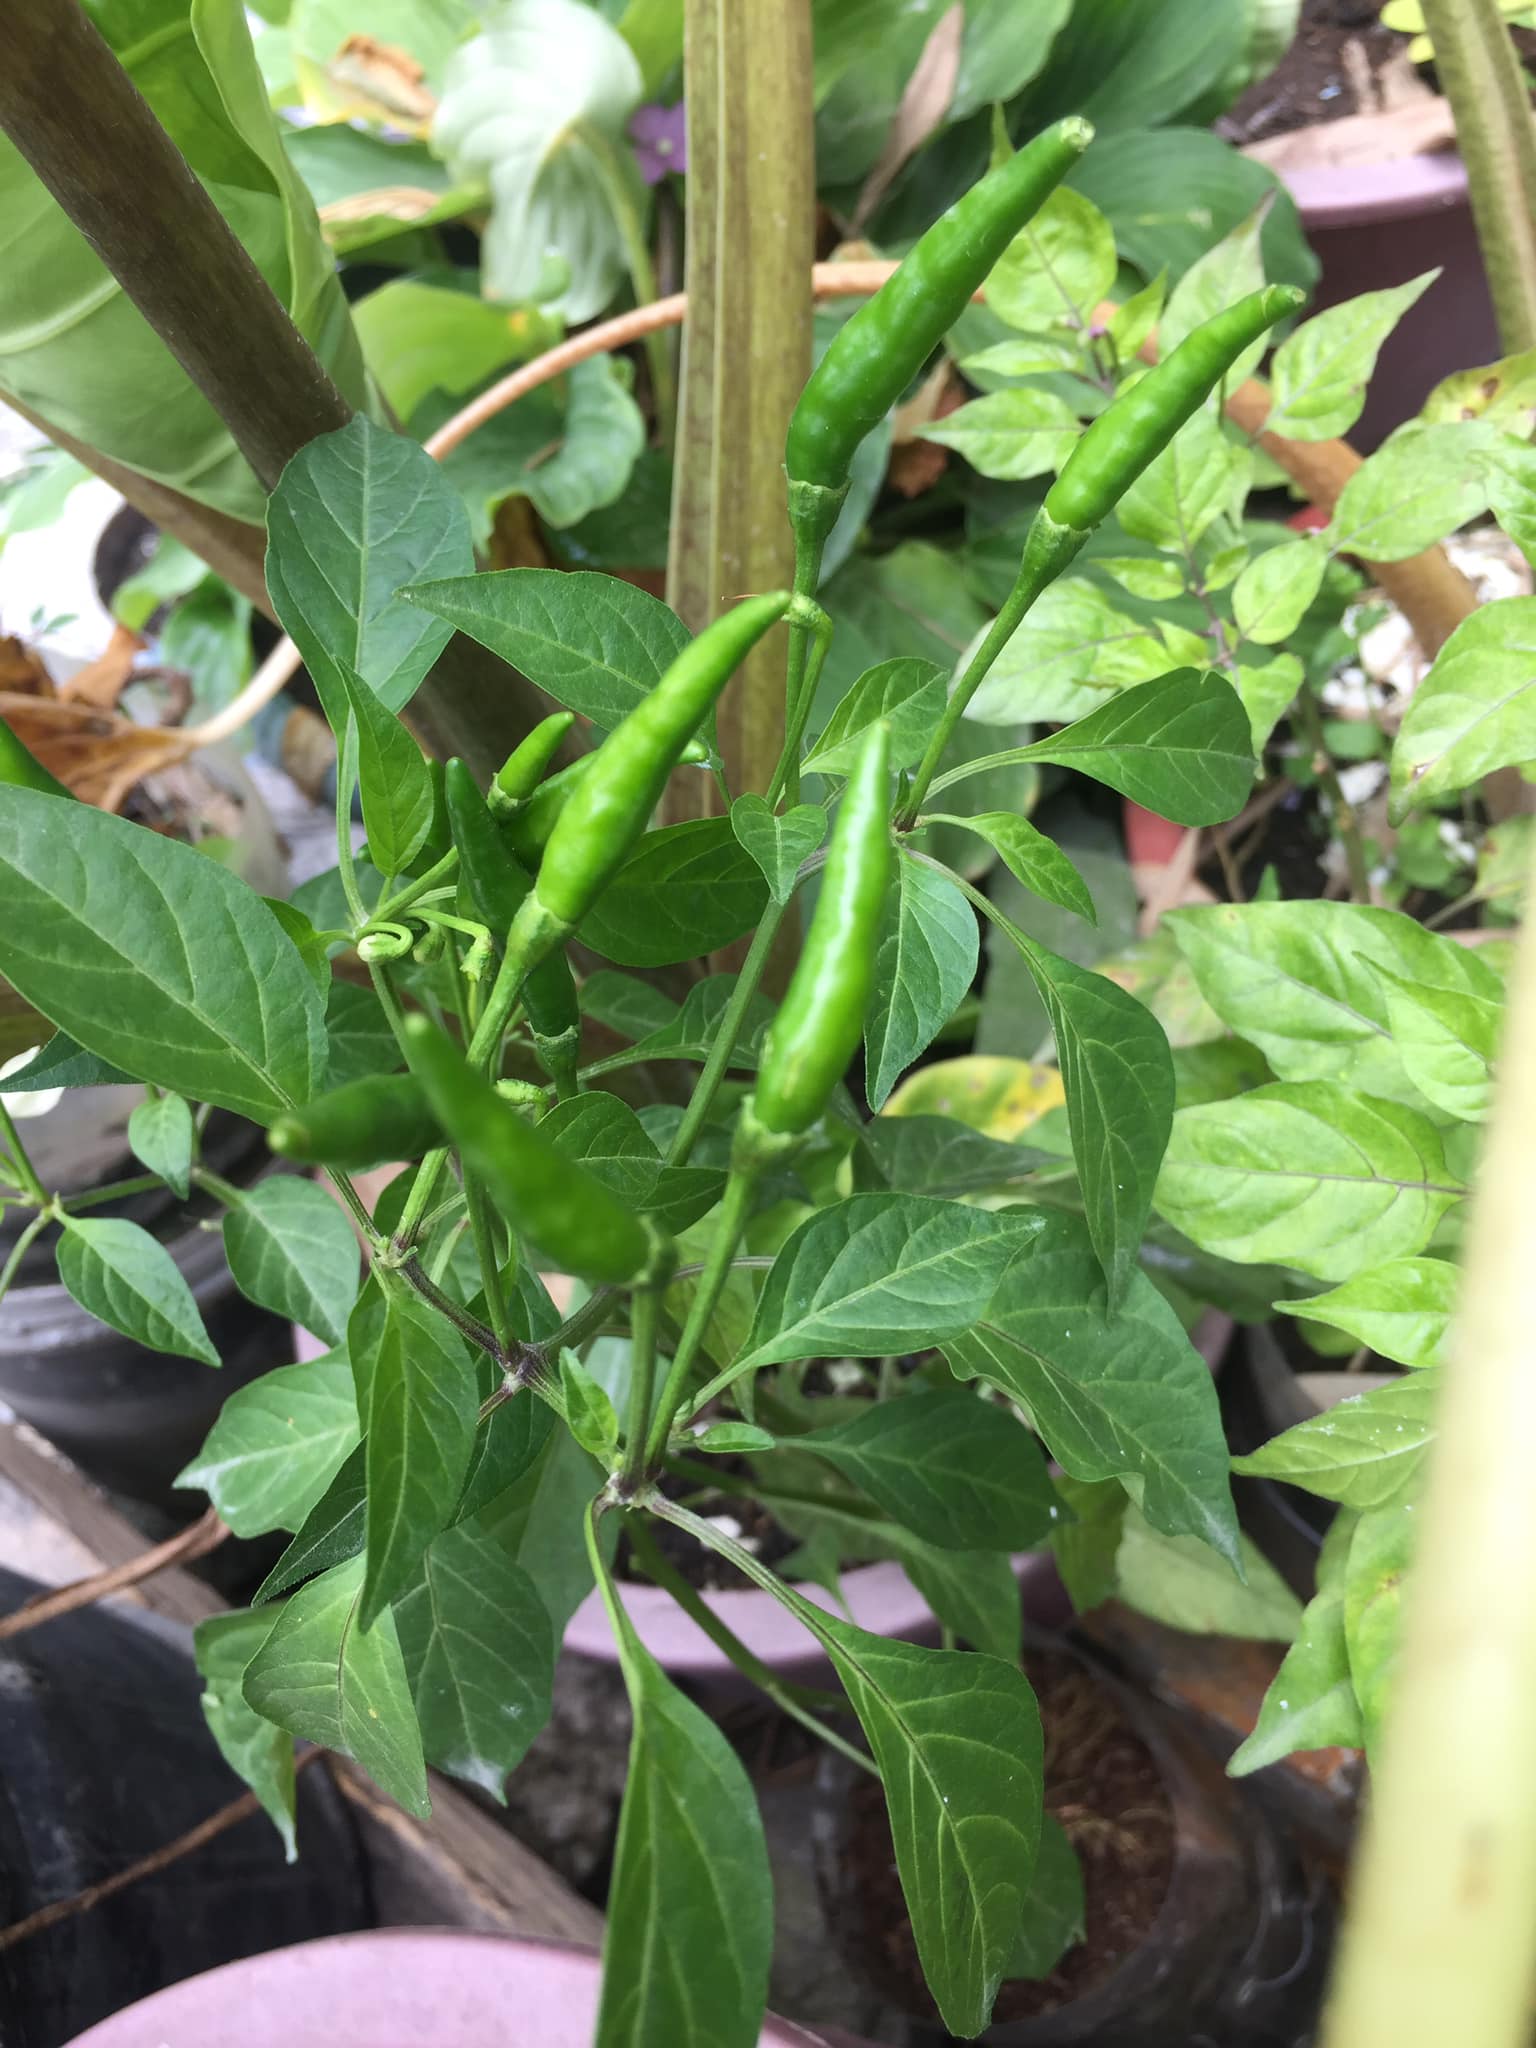
- Peppers: Dwarf or mini pepper varieties, like bell peppers or chili peppers, can thrive in containers. They produce abundant fruits and add a colorful touch to your garden.
- Beans: Bush beans, such as green beans or snap beans, are excellent choices for vertical gardening in plastic bottles. They require a trellis or support system but can produce a bountiful harvest.
Factors to consider when selecting vegetables for plastic bottle gardening
Consider these factors when choosing vegetables for your plastic bottle garden:
- Space requirements: Determine the mature size of the vegetable plant and ensure it can fit comfortably in the available bottle size and space. Choose compact or dwarf varieties for limited space.
- Root depth: Some vegetables, like carrots or potatoes, require deeper containers to accommodate their root systems. Select vegetables with shallow or compact root systems for smaller bottles.
- Light requirements: Assess the amount of sunlight available in your growing area. Choose vegetables that match the available light levels, as some plants require full sun, while others tolerate partial shade.
- Climate suitability: Consider the climate in your region and select vegetables that thrive in those conditions. Some plants are more heat-tolerant, while others prefer cooler temperatures.
Suggestions for companion planting and space optimization
Companion planting and space optimization techniques can maximize your plastic bottle garden’s productivity. Consider the following tips:
- Vertical gardening: Utilize trellises, stakes, or cages to support climbing plants like beans or cucumbers, saving horizontal space and allowing for better air circulation.
- Succession planting: Plant vegetables with different maturity dates in staggered intervals. As one vegetable is harvested, another is ready to take its place, ensuring a continuous harvest throughout the growing season.
- Interplanting: Combine plants with different growth habits and root depths to optimize space. For example, plant shallow-rooted lettuce or herbs alongside taller vegetables to make use of the vertical space.
- Companion planting: Some plants have natural synergies or repel pests when grown together. For example, planting marigolds alongside tomatoes can deter nematodes and provide natural pest control.
By choosing vegetables suited for container gardens, considering factors like space requirements, root depth, light, and climate suitability, and implementing companion planting and space optimization techniques, you can create a thriving plastic bottle garden that maximizes your harvest potential.
Sowing Seeds or Transplanting Seedlings Growing Vegetables In Plastic Bottles
Once you have chosen your vegetables, it’s time to start planting! Whether you prefer sowing seeds or transplanting seedlings, here are step-by-step instructions to guide you along the way, along with timing considerations for different vegetable varieties:
Step-by-step instructions for sowing seeds in plastic bottles
- Fill the plastic bottle container with the prepared soil mix, leaving some space at the top for watering.
- Moisten the soil lightly before sowing the seeds to ensure good contact between the seeds and the soil.
- Refer to the seed packet for specific instructions on seed depth and spacing.
- Gently press the seeds into the soil at the recommended depth, usually around two to three times the diameter of the seed.
- Place a shallow layer of soil over the seeds, making sure they receive sufficient protection without being excessively buried.
- Mist the soil surface with water to avoid displacing the seeds.
- Place a clear plastic bag or a plastic dome over the container to create a mini greenhouse effect and promote germination.
- Position the container in a warm area with indirect sunlight or under grow lights, maintaining a temperature suitable for seed germination.
- Monitor the moisture level regularly and mist the soil when necessary to keep it moist but not waterlogged.
- Once the seedlings have emerged and are established, remove the plastic cover and place the container in a location with appropriate sunlight.
Techniques for transplanting seedlings into bottle containers
If you prefer to start with seedlings, follow these techniques to transplant them into your plastic bottle containers:
- Fill the plastic bottle container with the prepared soil mix, leaving some space at the top for watering.
- Dig a hole in the soil mix, slightly larger than the root ball of the seedling.
- Gently remove the seedling from its original container, handling it by the leaves to avoid damaging the delicate stem.
- Place the seedling in the hole, ensuring it is at the same depth as it was in its original container.
- Fill the surrounding area with soil, gently pressing it to secure the seedling in place.
- Lightly water the newly transplanted seedling to settle the soil and help it establish in its new container.
- Place the container in an appropriate location with suitable sunlight and growing conditions for the specific vegetable variety.
Timing considerations for different vegetable varieties
Timing is crucial for successful vegetable growth. Consider the following factors when determining the appropriate timing for sowing seeds or transplanting seedlings for vegetables in plastic bottles
- Frost dates: Determine the average last frost date in your area. Start your seeds indoors a few weeks before the last frost date to give them a head start, or wait until after the last frost date to directly sow seeds or transplant seedlings outdoors.
- Days to maturity: Check the seed packet or plant label for the number of days to maturity. Count backward from the expected first frost date in your area to determine the ideal time to start seeds or transplant seedlings.
- Germination time: Different vegetables have varying germination times. Some seeds sprout quickly, while others may take longer. Consider the germination time when planning your planting schedule.
- Seasonal preferences: Certain vegetables prefer cooler temperatures, while others thrive in warm weather. Take into account the seasonal preferences of the vegetables you are growing and adjust your planting schedule accordingly.
By following these step-by-step instructions for sowing seeds or transplanting seedlings and considering timing considerations for different vegetable varieties, you can ensure a successful start to your plastic bottle garden.
Watering Vegetables In Plastic Bottles
Proper watering and irrigation are essential for the health and growth of your plants in plastic bottle gardens. Here are guidelines for watering, an introduction to different irrigation methods, and tips for preventing waterlogging and ensuring adequate drainage:
Guidelines for watering plants in plastic bottle gardens
- Monitor moisture levels: Regularly check the moisture level of the soil by inserting your finger into the top inch or two of soil. If it feels dry, it’s time to water.
- Water deeply: When watering, ensure the water reaches the root zone by watering deeply. Avoid shallow and frequent watering, as it encourages shallow root growth and increases the risk of waterlogging.
- Water at the base: Direct the water at the base of the plants rather than overhead. This helps prevent fungal diseases and ensures water reaches the roots where it is needed most.
- Avoid overwatering: Excess water can lead to waterlogged soil and root rot. Allow the soil to dry out slightly between watering to prevent overwatering.
- Consider the weather: Adjust your watering frequency based on the weather conditions. During hot and dry periods, plants may require more frequent watering, while cooler and rainy periods may require less frequent watering.
Introduction to different irrigation methods and their suitability
Different irrigation methods can be employed in plastic bottle gardens. Here are some commonly used methods:
- Hand watering: This method involves using a watering can or hose to water the plants manually. Hand watering allows for better control over the amount of water applied, making it suitable for smaller gardens or individual plants. It is essential to ensure even water distribution and avoid excessive water pressure that may dislodge the soil.
- Drip irrigation: Drip irrigation delivers water directly to the root zone of the plants through a system of tubes with emitters. This method conserves water by reducing evaporation and ensures precise and efficient watering. Drip irrigation systems can be set up using modified plastic bottles or commercially available drip irrigation kits.
- Self-watering systems: Self-watering systems utilize wicks or reservoirs to supply water to the plants as needed. These systems can be created by inserting wicks made of cotton or synthetic materials into the soil, which draw water from a separate container or reservoir. Self-watering systems are particularly useful for maintaining consistent moisture levels and reducing the frequency of manual watering.
Tips for preventing waterlogging and ensuring adequate drainage
Here are some tips to prevent waterlogging and ensure adequate drainage in your plastic bottle garden:
- Good drainage holes: Ensure that your plastic bottle containers have sufficient drainage holes at the bottom to allow excess water to escape. These holes prevent water from accumulating at the roots and promote healthy root growth.
- Layer of gravel: Place a layer of small rocks or gravel at the bottom of the container before adding the soil. This layer aids in drainage by preventing the soil from compacting and blocking the drainage holes.
- Avoid overwatering: Water your plants only when necessary and avoid excessive watering. Allow the top inch or two of soil to dry out between watering sessions to prevent waterlogging.
- Elevate containers: Raise your plastic bottle containers slightly off the ground using bricks, blocks, or a raised platform. Elevating the containers promotes better airflow and allows excess water to drain freely.
- Proper soil mix: Ensure that your soil mix is well-draining. Incorporate materials like perlite, vermiculite, or coarse sand to improve drainage and aeration.
Nutrient Management and Pest Control
Proper nutrient management and effective pest control are essential for the successful growth of vegetables in plastic bottle gardens. Here we will explore the nutritional needs of container-grown vegetables, organic fertilization options, techniques for optimal growth, as well as common pests and diseases in plastic bottle gardens and their remedies:
Understanding the Nutritional Needs of Vegetables In Plastic Bottles
Container-grown vegetables have specific nutritional requirements due to their limited root space. Consider the following factors when managing the nutrients for your plastic bottle garden:
- Balanced fertilization: Provide a balanced supply of essential nutrients, including nitrogen (N), phosphorus (P), and potassium (K). These macronutrients support overall plant growth, root development, flowering, and fruiting.
- Micro-nutrients: Ensure an adequate supply of micronutrients such as iron, magnesium, calcium, and others. These are essential for healthy plant development and preventing nutrient deficiencies.
- Organic matter: Incorporate organic matter, such as compost, into the soil mix. Organic matter improves soil fertility, moisture retention, and nutrient availability.
- pH levels: Monitor the pH levels of the soil to ensure optimal nutrient uptake. Most vegetables prefer a slightly acidic to neutral pH range of 6.0 to 7.0.
2.4 Organic fertilization options and techniques for optimal growth
Organic fertilization provides a sustainable and environmentally friendly approach to nourishing your plants. Consider the following options and techniques for organic fertilization:
- Compost: Utilize homemade or commercially available compost to enrich the soil with organic matter and nutrients. Apply compost as a top dressing or incorporate it into the soil mix during planting.
- Worm castings: Apply them as a top dressing or mix them into the soil to provide a slow-release source of nutrients.
- Organic liquid fertilizers: Use organic liquid fertilizers, such as seaweed extracts or fish emulsion, to provide a quick nutrient boost to your plants. Dilute according to the product instructions and apply as a foliar spray or through root irrigation.
- Manure tea: Create a nutrient-rich solution by steeping well-rotted manure in water. Strain the liquid and use it to water your plants as a natural and nourishing fertilizer.
- Crop rotation and cover crops: Practice crop rotation by changing the vegetable varieties grown in your plastic bottle garden each season. Additionally, consider incorporating cover crops, such as legumes, which fix nitrogen in the soil and enhance its fertility.
Common pests and diseases growing vegetables in plastic bottles and their remedies
Plastic bottle gardens are not immune to pests and diseases. Below are several typical challenges you might face along with potential solutions to address them:
- Aphids: These small, sap-sucking insects can be controlled by spraying plants with a mixture of soapy water or neem oil. You can also manage aphid populations by introducing beneficial insects such as ladybugs or lacewings, which offer effective control.
- Snails and slugs: These pests can damage foliage and fruits. Use organic methods like handpicking, creating barriers with copper tape, or placing traps to deter and capture them.
- Fungal diseases: Diseases like powdery mildew and leaf spot can affect plant health. Provide adequate spacing between plants to improve airflow and reduce humidity. To discourage the growth of fungi, it is advisable to refrain from using overhead watering techniques. Apply organic fungicides like copper-based sprays when necessary.
- Root rot: Excessive watering and inadequate drainage can result in root rot, a condition where the roots of a plant decay. Ensure proper drainage in your plastic bottle containers and adjust watering practices to prevent waterlogging.
- Caterpillars and larvae: Handpick caterpillars and larvae from plants and apply organic insecticides like Bacillus thuringiensis (Bt) if infestations are severe.
- Plant diseases: Monitor plants for signs of diseases like damping-off or wilting. Remove and destroy affected plants promptly to prevent the spread of pathogens.
Regularly inspect your plants, practice good hygiene, and provide optimal growing conditions to prevent and manage pests and diseases effectively in your plastic bottle garden.
Pruning, Staking, and Support Systems For Growing Vegetables In Plastic bottles
Pruning, staking, and implementing support systems are essential practices for managing and maximizing space in your vegetables in plastic bottles. Here we will explore the importance of pruning and training plants in limited space, techniques for staking and supporting vegetable plants in bottles, and creative ideas for vertical gardening using plastic bottles:
Importance of pruning and training plants in limited space
Pruning and training plants help control their growth, improve airflow, and maximize productivity, especially in limited space. Here’s why pruning is important:
- Space optimization: Pruning helps manage the size and shape of plants, ensuring they fit well within the confines of the plastic bottle containers and prevent overcrowding.
- Improved airflow: Proper pruning opens up the foliage, allowing for better air circulation. This reduces the risk of fungal diseases and promotes healthy plant growth.
- Enhanced light penetration: Pruning removes excessive foliage that may shade other plants or limit sunlight penetration. Increased light exposure aids in photosynthesis and overall plant vigor.
- Increased productivity: By removing excess branches or suckers, plants can direct their energy towards producing larger, healthier fruits and vegetables.
Techniques for staking and supporting vegetables in plastic bottles
Staking and supporting vegetable plants in plastic bottle gardens ensure proper growth, prevent damage, and optimize space. Consider the following techniques:
- Tomato cages: Insert a tomato cage into the plastic bottle container when planting indeterminate tomato varieties. As the plants grow, guide the stems through the openings in the cage, providing support and preventing sprawling.
- Bamboo stakes: Place a sturdy bamboo stake next to the plant and gently tie the stem to the stake using soft plant ties or twine. This provides support for tall or top-heavy plants like peppers or eggplants.
- Trellises and netting: Install trellises or netting along the sides or backs of your plastic bottle containers. Train vining plants like beans or cucumbers to climb the trellises or netting, saving horizontal space and allowing better air circulation.
- Vertical PVC pipe structures: Create a vertical garden by attaching PVC pipes horizontally or vertically to a supporting frame. Cut holes in the pipes and insert smaller plastic bottles with plants, creating a unique and space-saving vertical gardening system.
Creative ideas for vertical gardening for growing vegetables in plastic bottles
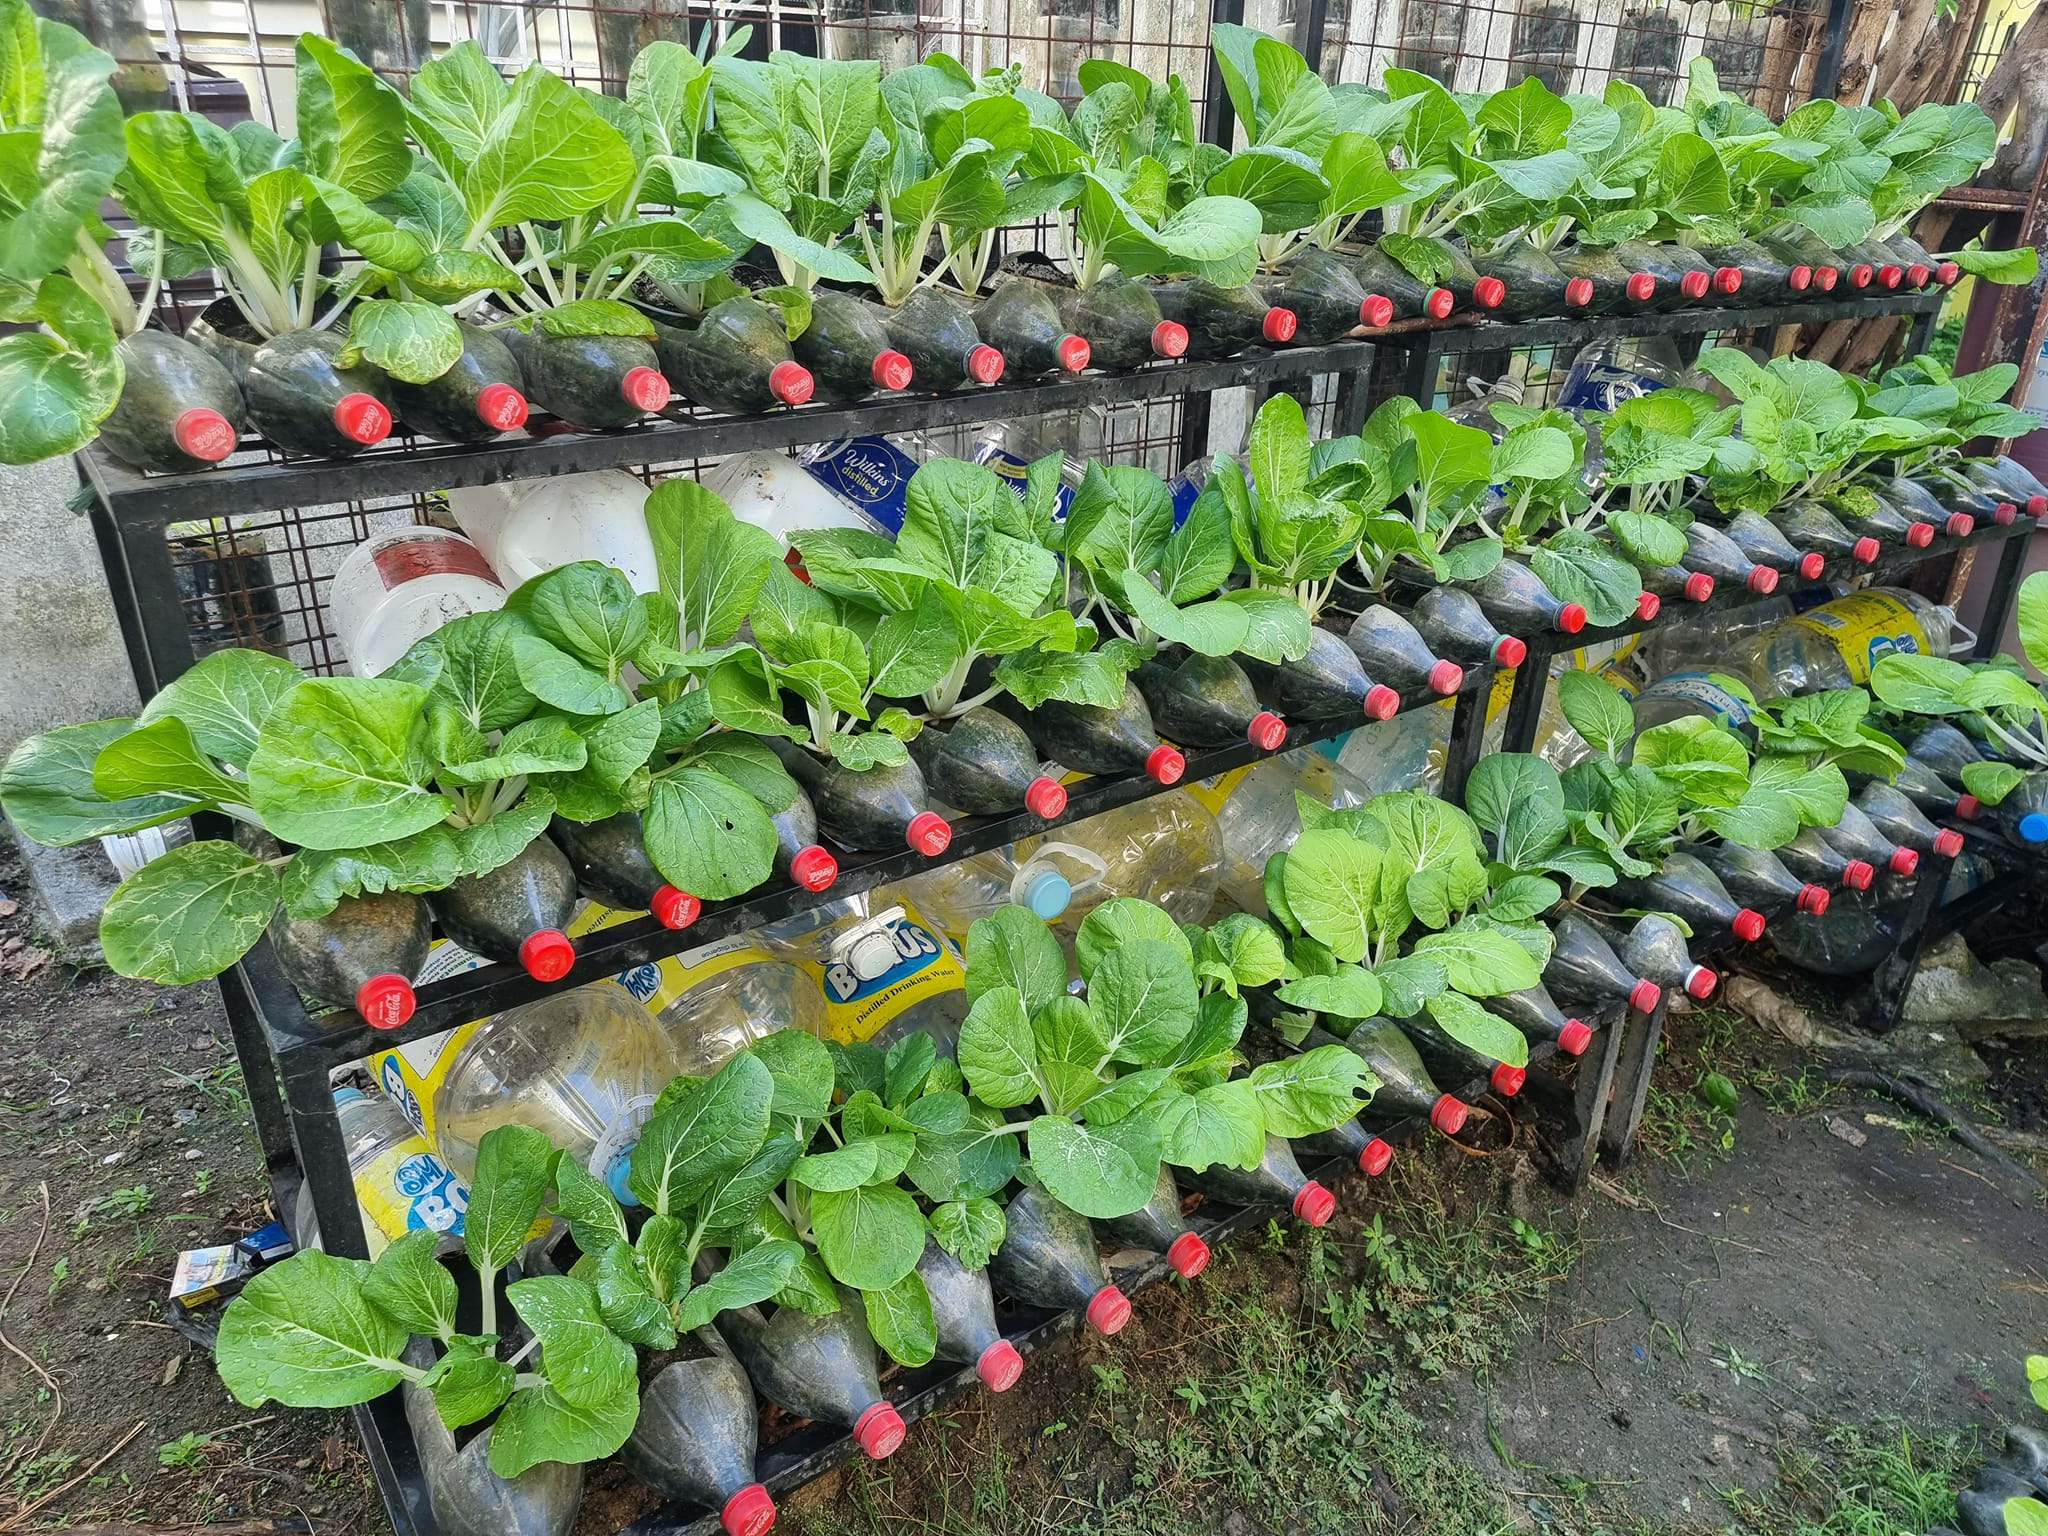
Vertical gardening maximizes space and adds visual appeal to your vegetables in a plastic bottles garden. Here are some creative ideas:
- Tower garden: Stack multiple plastic bottle containers on top of one another, creating a tower. Plant different vegetables in each container, utilizing the vertical space efficiently.
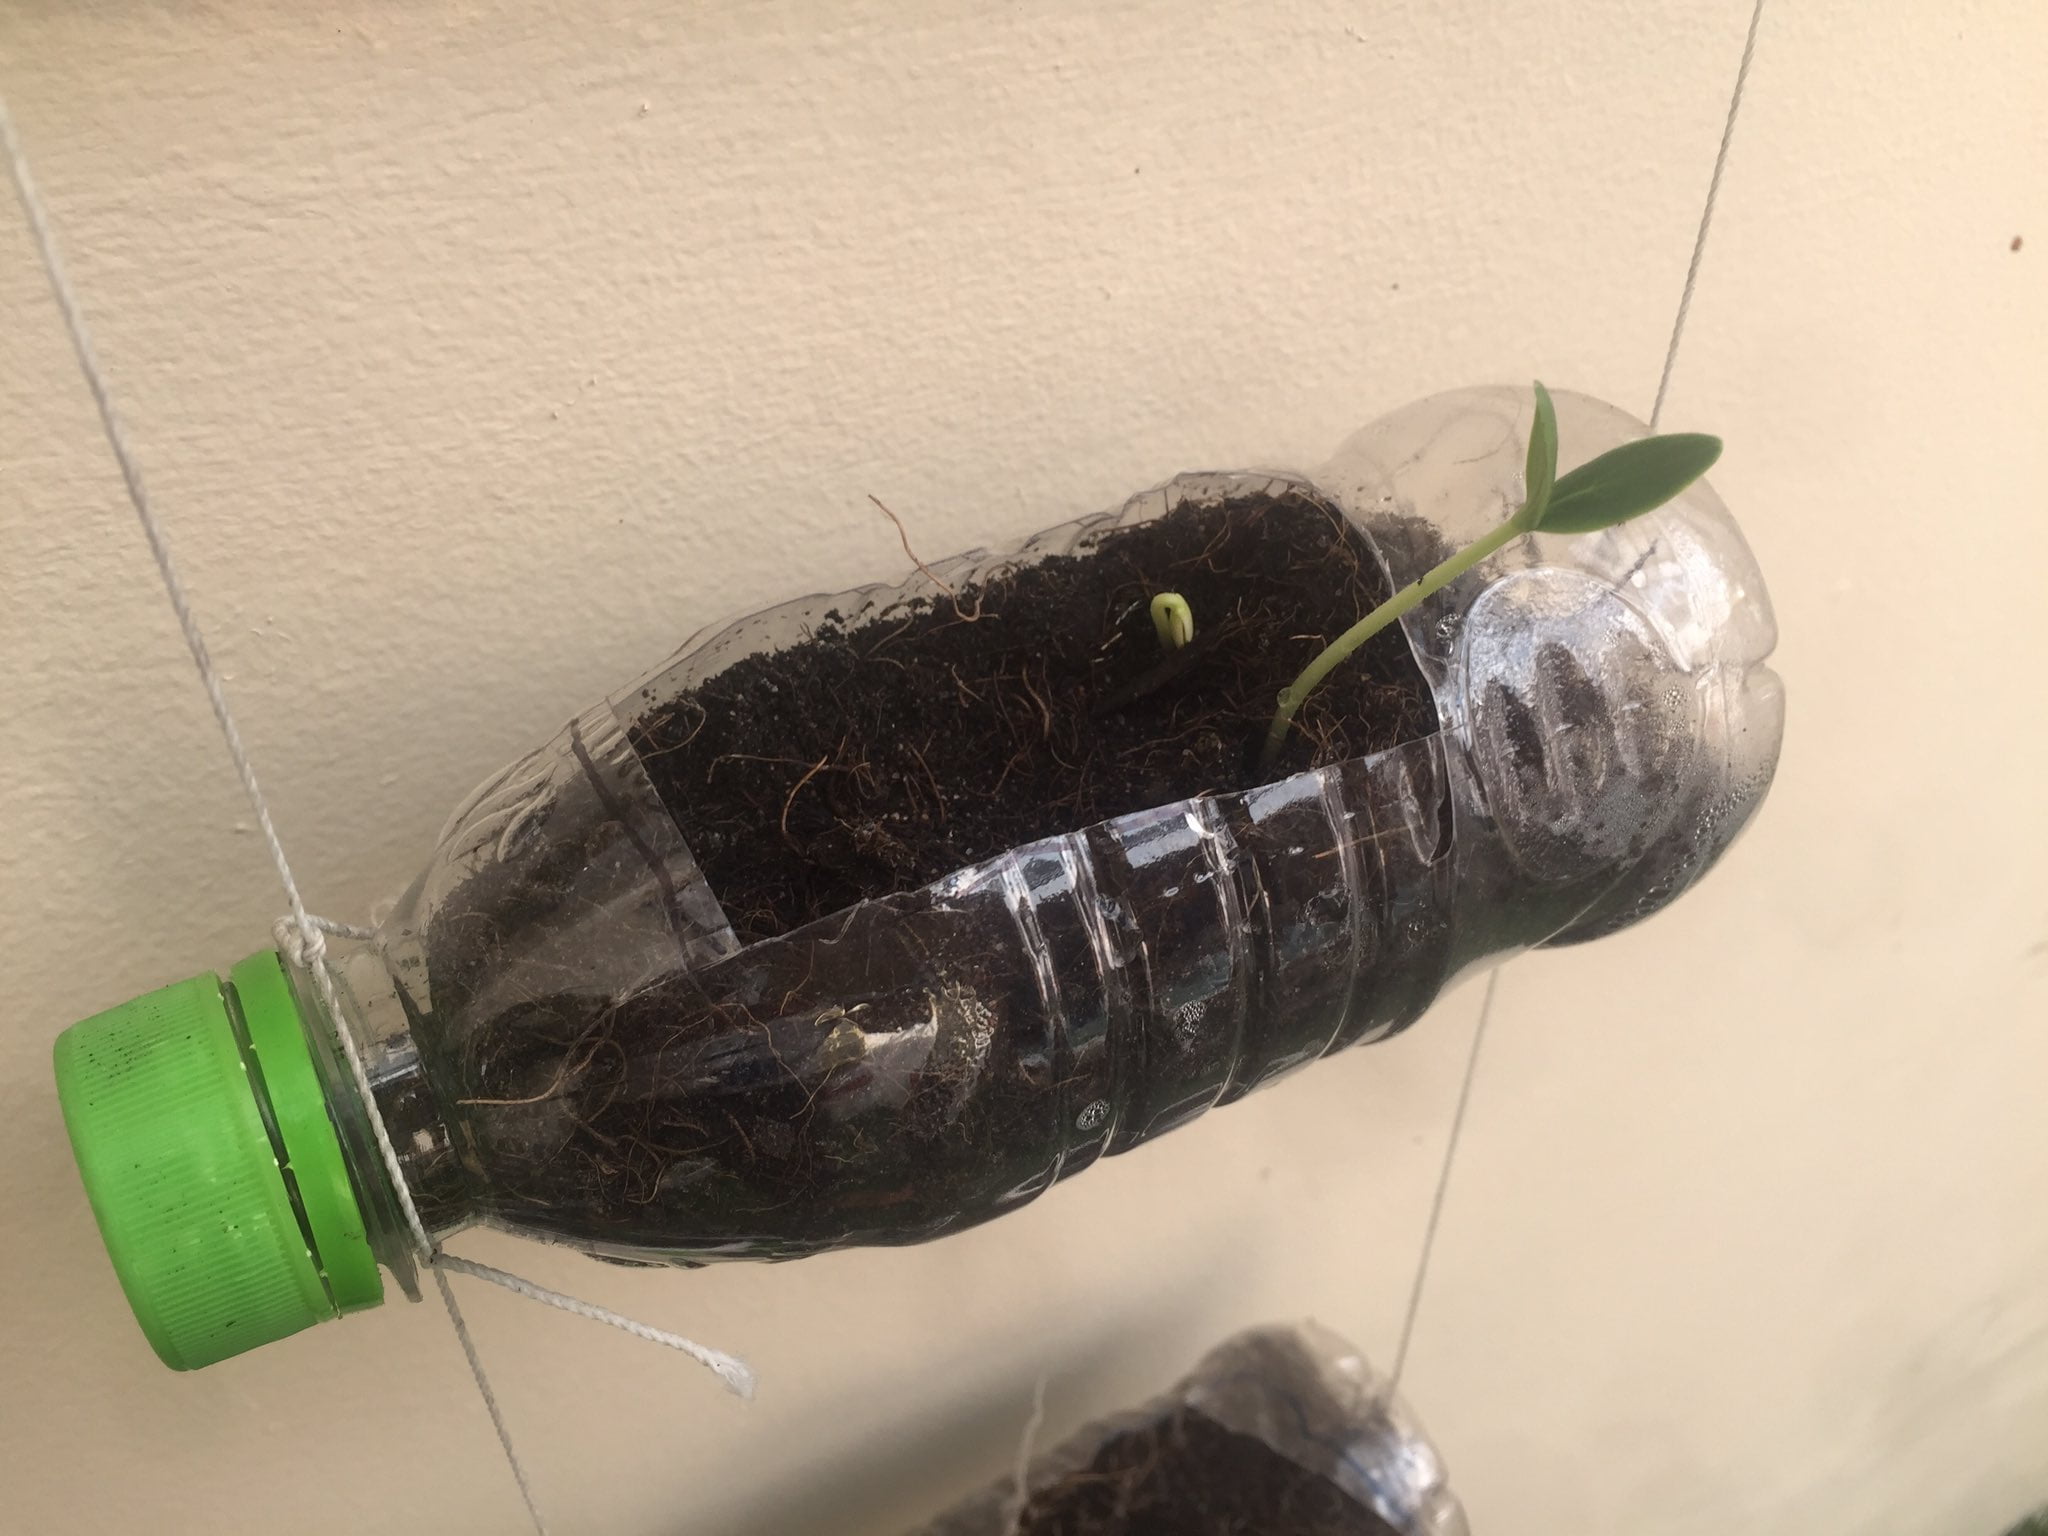
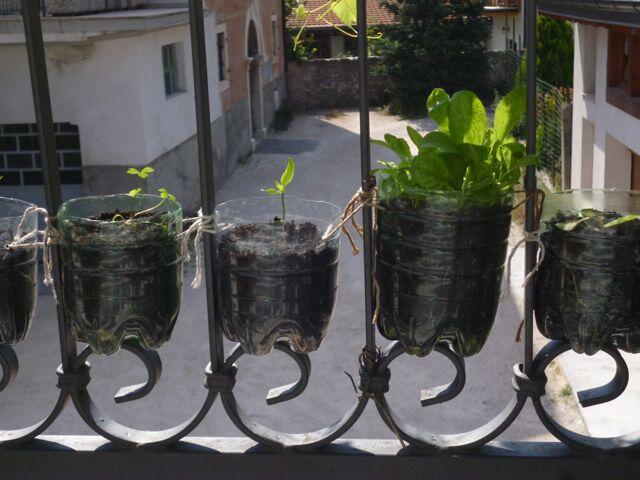
- Hanging planters: Hang plastic bottles from a sturdy support structure using strings or ropes. Plant trailing or cascading plants like strawberries or trailing herbs, allowing them to drape down.
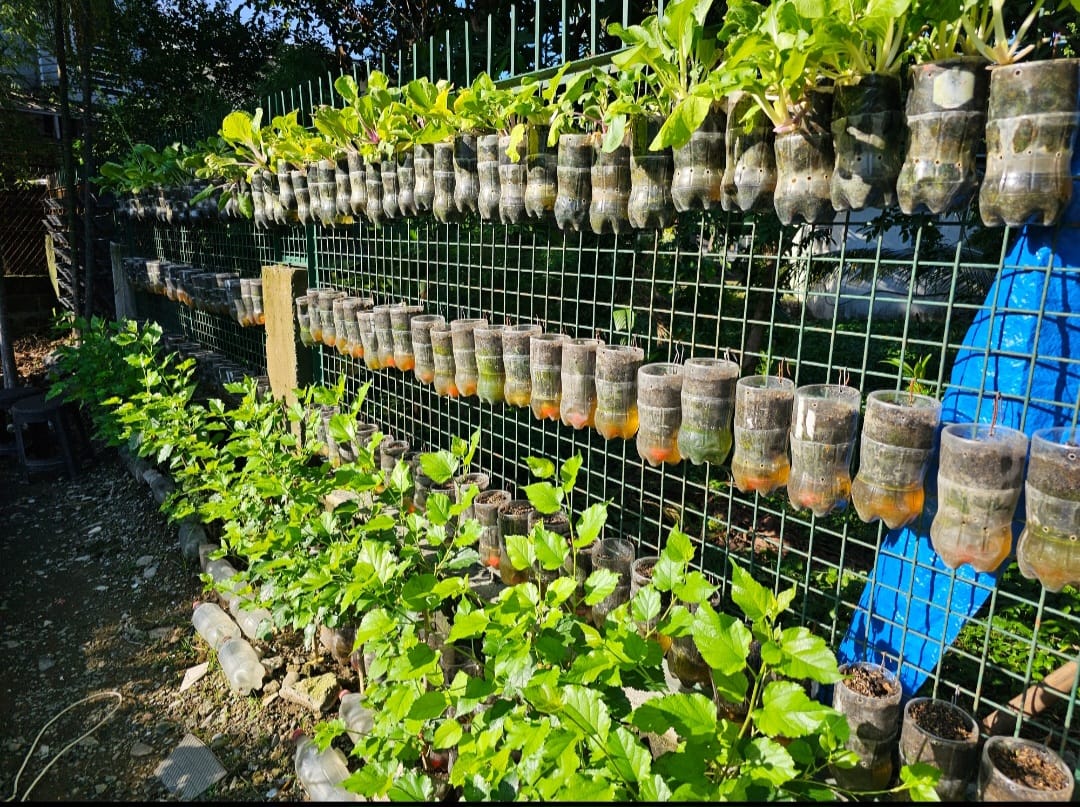
- Living wall: Attach plastic bottles horizontally to a wall or fence using brackets or hooks. Plant herbs, lettuces, or other small vegetables in the bottles, creating a lush and functional living wall.
- Shoe organizer garden: Hang a shoe organizer on a wall or fence and fill each pocket with soil and a plant. Plastic bottles can be used as the individual planting containers within each pocket.
These creative ideas not only maximize space but also transform your plastic bottle garden into an eye-catching vertical display.
Section 3: Harvesting and Enjoying Your Bounty
Monitoring Plant Growth
Monitoring plant growth is crucial to determine the right time for harvest and ensure the health and progress of your vegetables in plastic bottles. In this section, we will discuss signs of plant readiness for harvest, techniques for monitoring plant health and growth progress, as well as addressing common growth issues in plastic bottle gardens.
Signs of plant readiness for harvest
- Fruit/vegetable color: Pay attention to the color of the fruits or vegetables. They should reach their mature color or desired ripeness. For example, tomatoes should be fully red, and peppers should have vibrant hues.
- Size and shape: Assess the size and shape of the produce. Different vegetables have different optimal sizes for harvest. For instance, leafy greens like lettuce can be harvested when they reach a suitable size for your preference.
- Texture: Check the texture of the produce. Vegetables like cucumbers should be firm and crisp, while certain root vegetables like radishes should have a crunchy texture.
- Harvesting guides: Consult gardening resources or seed packets for specific harvesting instructions for different vegetables. They often provide guidance on when to harvest based on appearance and feel.
Techniques for monitoring plant health and growth progress
- Observation: Regularly observe your plants for any changes in appearance, such as discoloration, wilting, or pest damage. Visual cues can indicate nutrient deficiencies, diseases, or insect infestations.
- Leaf and stem health: Inspect the leaves and stems for signs of yellowing, spots, or abnormalities. Healthy leaves should be vibrant and free from major blemishes.
- Growth rate: Monitor the growth rate of your plants. They should exhibit steady growth over time. A lack of growth or stunted growth could indicate issues such as nutrient deficiencies, improper watering, or root-bound conditions.
- Flowering and fruiting: Observe the development of flowers and fruits. Proper flowering and fruiting are indicators of healthy plants. Lack of flowers or fruits could suggest issues like inadequate sunlight or pollination problems.
Addressing common growth issues in growing vegetables in plastic bottles
- Nutrient deficiencies: If plants show signs of nutrient deficiencies, such as yellowing leaves or stunted growth, adjust your fertilization practices. Apply organic fertilizers or amendments specific to the nutrient requirements of the affected plants.
- Watering issues: Monitor soil moisture levels and adjust watering practices accordingly. Overwatering can lead to waterlogged soil, while underwatering can cause drought stress. Maintain a balance to prevent issues like root rot or wilting.
- Pest management: Implement preventive measures like regular inspections, companion planting, or organic pest control methods. If pests become a significant issue, use organic insecticides or seek advice from local gardening experts.
- Disease prevention: Promote good airflow and hygiene practices to minimize the risk of fungal or bacterial diseases. Ensure proper drainage, avoid overcrowding, and remove and dispose of diseased plants promptly.
Regular monitoring, timely intervention, and addressing growth issues promptly will help maintain the health and productivity of your plants vegetables in plastic bottles garden.
In the next sections, we will explore harvesting techniques, post-harvest care, and ways to enjoy the bountiful harvest from your plastic bottle garden.
Harvesting Techniques
Proper harvesting techniques ensure that you can enjoy the fruits of your labor while preserving the health of your plastic bottle garden. Here are some harvesting tips for different vegetable varieties, methods for harvesting without damaging the plants or containers, and strategies for maximizing yields through successive plantings and companion planting.
Harvesting tips for different vegetable varieties
- Leafy greens (lettuce, spinach, kale): Harvest individual leaves or cut the outer leaves, allowing the inner leaves to continue growing. For loose-leaf lettuce, cut the leaves at the desired height above the soil. When harvesting head lettuce, it is recommended to cut the entire head just above the soil level.
- Herbs (basil, parsley, cilantro): Harvest herbs by snipping the leaves or stems individually, starting from the outer portions of the plant. Avoid removing more than one-third of the plant at a time to ensure continued growth.
- Root vegetables (radishes, carrots): Gently pull radishes out of the soil when they reach the desired size. For carrots, loosen the soil around them and carefully pull them out to avoid breakage.
- Tomatoes: Harvest tomatoes when they have reached their mature color and are slightly soft to the touch. Twist or cut the stem just above the fruit to separate it from the plant.
- Peppers: Harvest peppers when they have fully ripened to their mature color. Utilize a well-sharpened knife or a pair of scissors to carefully sever the stem slightly above the pepper when performing the cutting process.
- Beans: Harvest beans when they are young and tender. Snap them off the plant by hand or use scissors, taking care not to damage the stems or other parts of the plant.
Methods for harvesting without damaging the plants or containers
- Use appropriate tools: When harvesting, use sharp pruners, scissors, or knives to minimize damage to the plants. Clean and sanitize the tools between plants to prevent the spread of diseases.
- Handle with care: Handle plants gently during harvest to avoid breaking stems or damaging foliage. Support the plant with one hand while harvesting with the other.
- Avoid excessive pressure: Apply gentle pressure when harvesting fruits or vegetables to prevent bruising or crushing. Be mindful of the delicate structures of the plants and containers.
Maximizing yields through successive plantings and companion planting
- Successive plantings: Stagger your plantings by sowing seeds or transplanting seedlings at different times. This allows for a continuous supply of vegetables throughout the growing season. As you harvest mature plants, replant the containers with new seeds or seedlings.
- Companion planting: Take advantage of companion planting techniques to maximize space and yields. Plant compatible vegetables together, such as lettuce and radishes, to make efficient use of the container and encourage healthy growth. The radishes will mature before the lettuce needs more space, allowing you to harvest and replant.
3.3 Culinary Delights from Your Plastic Bottle Garden
Your plastic bottle garden can provide an abundance of fresh, homegrown vegetables that can be transformed into delicious culinary creations. Here are recipe ideas showcasing homegrown vegetables, creative ways to incorporate fresh produce into everyday meals, and exploring preservation methods for excess harvest.
Recipe ideas showcasing homegrown vegetables
- Fresh garden salad: Combine freshly harvested lettuce, spinach, and other leafy greens with cherry tomatoes, cucumbers, and herbs. Top it off with a homemade vinaigrette for a refreshing salad.
- Caprese skewers: Create Caprese skewers by alternating threading cherry tomatoes, fresh basil leaves, and mozzarella balls onto the skewers.
- Stir-fried vegetables: Sauté a medley of harvested vegetables like bell peppers, zucchini, and snap peas with garlic and soy sauce for a quick and flavorful side dish.
- Herb-infused pasta: Toss freshly cooked pasta with sautéed vegetables, such as cherry tomatoes, spinach, and herbs like basil or parsley. After assembling the skewers, lightly drizzle them with olive oil and sprinkle a generous amount of grated Parmesan cheese over the top.
- Homemade salsa: Dice homegrown tomatoes, onions, and peppers. Mix with fresh cilantro, lime juice, and a pinch of salt for a vibrant and flavorful salsa. Serve with tortilla chips or use as a topping for tacos and grilled meats.
Creative ways to incorporate fresh produce into everyday meals
- Garden-fresh omelette: Incorporate diced vegetables like bell peppers, onions, and spinach into a fluffy omelette for a nutritious and flavorful breakfast or brunch.
- Veggie wraps: Fill whole-grain wraps with thinly sliced cucumbers, lettuce, grated carrots, and herbs. Add a protein source like grilled chicken or tofu for a satisfying and healthy lunch.
- Roasted vegetable medley: Toss a variety of chopped vegetables, such as potatoes, carrots, beets, and onions, with olive oil, salt, and herbs. For a delightful side dish, roast the skewers in the oven until they become tender and develop a caramelized texture.
- Grilled vegetable skewers: Skewer chunks of homegrown vegetables like cherry tomatoes, bell peppers, zucchini, and mushrooms. Brush with olive oil, sprinkle with herbs, and grill until lightly charred. You can serve these skewers either as a side dish or as a satisfying vegetarian main course.
- Garden-inspired pizzas: Top homemade pizza dough with a variety of sliced vegetables like tomatoes, peppers, onions, and fresh herbs. Add cheese of your choice and bake until golden and bubbly.
Exploring preservation methods for excess harvest
- Freezing: Blanch vegetables like beans, peas, or corn in boiling water for a few minutes, then quickly cool them in ice water. Pack them into freezer-safe bags or containers for long-term storage.
- Canning: Preserve excess tomatoes by making homemade tomato sauce or salsa. Follow proper canning techniques to ensure safety and store the jars in a cool, dark place.
- Pickling: Create flavorful pickles by brining cucumbers, peppers, or other vegetables in vinegar, water, and spices. Store the pickles in sterilized jars in the refrigerator for a tangy and crisp snack.
- Drying: Dry herbs by hanging them upside down in a cool, well-ventilated area until they are completely dry. Store the dried herbs in airtight containers for later use.
- Herb-infused oils: Infuse oils with fresh herbs like basil, rosemary, or thyme. Place the herbs in a bottle, cover with oil, and let it sit for a few weeks to infuse the flavors. Strain the oil and store it in a cool, dark place for use in dressings, marinades, or cooking.