This post may have affiliate links. This means that sometimes when you click a link on our site and make a purchase on Amazon, we may earn a small commission at no additional cost to you. We only recommend products we truly believe in, and your support helps keep us running!
Have you ever admired the vibrant green shoots peeking out from a forgotten clove of garlic in the back of your crisper drawer? Did you ever wonder if you could cultivate this verdant life yourself, right on your windowsill? Well, wonder no more! Growing garlic in water is a surprisingly simple and rewarding endeavor, perfect for anyone with a curious green thumb or a penchant for fresh flavors.
This method allows you to witness the fascinating transformation of a humble clove into a lush, leafy wonder. Not only is it a fun science experiment for curious minds, but it also yields a steady supply of zesty garlic scapes and vibrant greens for your culinary creations.
Unveiling the Garlic’s Hidden Potential
Garlic, a staple ingredient in kitchens worldwide, is more than just a flavor powerhouse. This member of the allium family boasts a surprising capacity for growth, even without soil. When placed in water, a garlic clove undergoes a remarkable metamorphosis, sprouting vibrant green shoots and developing a network of white roots.
While this method won’t yield a full head of garlic suitable for harvesting cloves, it allows you to enjoy the fresh, garlicky goodness of the scapes and leaves. Garlic scapes, the curly flower stalks that emerge from the plant, are a delightful seasonal treat. They possess a milder garlic flavor compared to the cloves and can be enjoyed grilled, stir-fried, or even pickled. The vibrant green leaves, on the other hand, add a delightful touch of garlicky zest to salads, pestos, or simply snipped over your favorite dish.
Setting Up Your Garlic Oasis
The beauty of growing garlic in water lies in its simplicity. Here’s what you’ll need to get started:
- Garlic Bulbs: Opt for organic garlic bulbs whenever possible. Avoid using store-bought garlic that has been treated with sprout inhibitors.
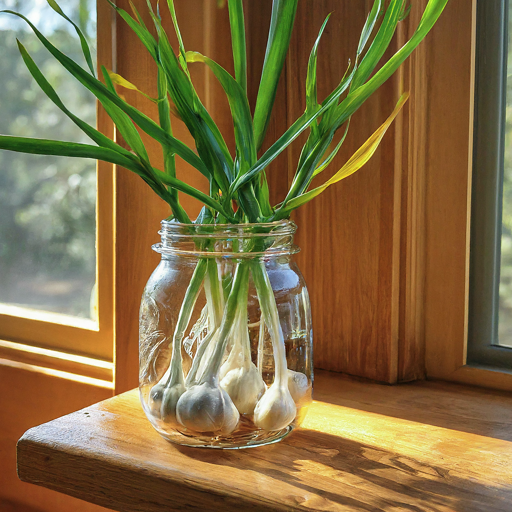
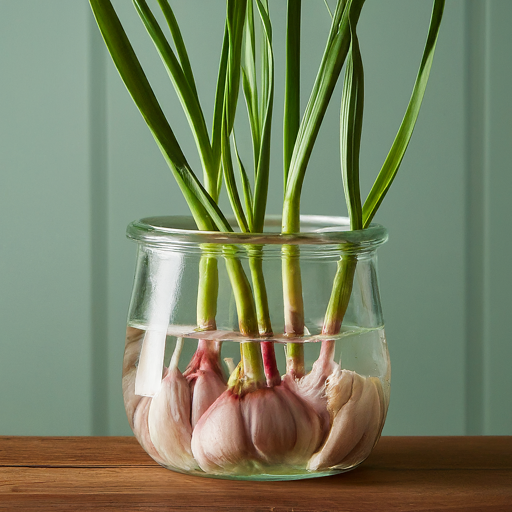
- Container: A clear glass jar is ideal, as it allows you to witness the fascinating root development. Mason jars, drinking glasses, or even recycled glass bottles can all be repurposed for this project.
- Water: Fresh, clean tap water is perfectly suitable.
The Sprouting Symphony
Now that you have your supplies gathered, it’s time to awaken the hidden potential within your garlic clove:
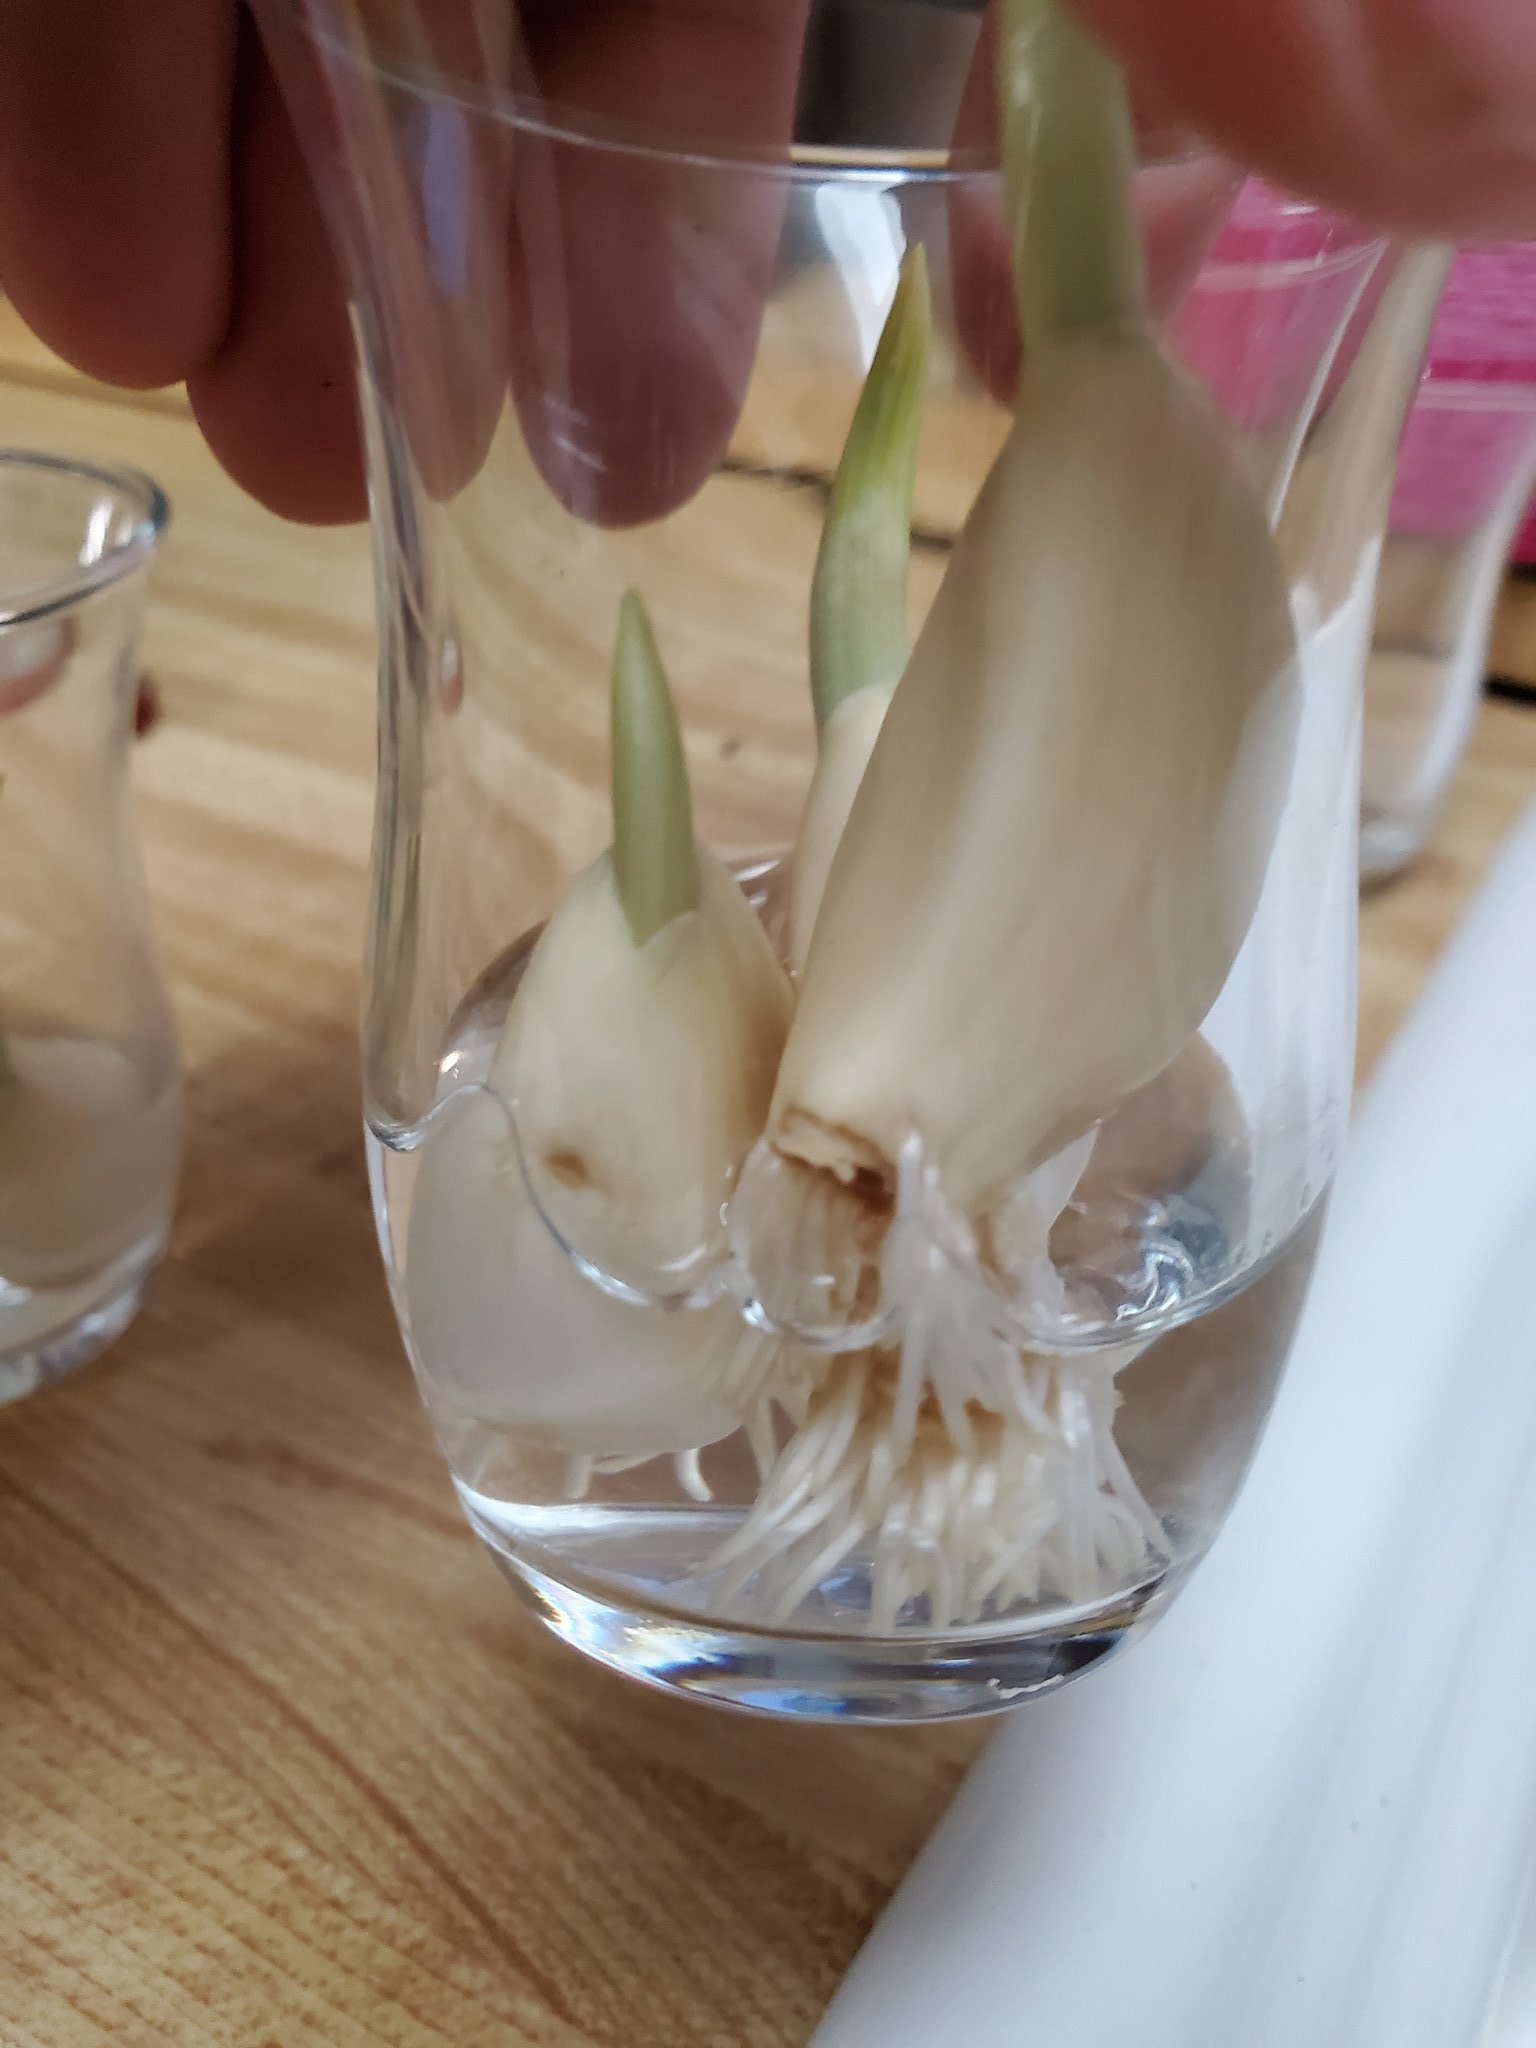
- Separate the Cloves: Gently break apart the head of garlic, separating the individual cloves. Choose the plumpest and firmest ones for planting.
- Prepare the Cloves (Optional): For faster sprouting, carefully remove the papery skin from the cloves. However, leaving the skin on won’t hinder the growth process – it’s simply a matter of personal preference.
- Positioning the Cloves: Place the chosen cloves, pointed end facing upwards, on the rim of your chosen container. Ensure the base of the clove dips slightly into the water, but avoid submerging the entire clove.
- Finding the Perfect Spot: Locate a sunny windowsill for your garlic haven. Aim for at least 6 hours of indirect sunlight daily.
- The Waiting Game: Be patient! Sprouting can take anywhere from a few days to a couple of weeks. In the meantime, keep the water level consistent, ensuring the base of the clove remains in contact with the water.
Witnessing the Transformation
As days turn into weeks, you’ll witness the magic unfold. Tiny white roots will begin to emerge from the base of the clove, reaching down towards the water. Soon after, you’ll be delighted to see a vibrant green shoot pushing upwards from the pointed end.
Nurturing Your Garlic Creation
Here are some simple tips to ensure your garlic thrives:
- Water Changes: Refresh the water every 3-4 days to prevent stagnation and promote healthy growth.
- Sunlight Matters: Ensure your garlic receives sufficient indirect sunlight throughout the day.
- Root TLC: If the roots start to tangle or appear brown, gently trim away the affected sections.
Harvesting the Rewards
After a few weeks, your garlic plant should be sporting a healthy head of vibrant green leaves. You can now begin to harvest!
- Garlic Scapes: Keep an eye out for a curly stalk emerging from the center of the plant. This is the garlic scape, a delicious seasonal treat. Harvest the scape by gently cutting it at the base with a sharp knife.
- Garlic Leaves: Snip the individual leaves as needed for your culinary creations. Remember, the younger leaves tend to have a milder garlic flavor, while the mature ones pack a stronger punch.
Pro Tip: Regularly harvesting the scapes and leaves encourages the plant to produce more, extending your harvest window.