Going on vacation but worried about keeping your potted tomato plants watered while you’re gone? Don’t let fears of wilting plants ruin your time away. We’re about to spill the beans on how to pamper your precious potted tomatoes while you soak up the sun. Dive into this juicy guide and learn the ropes of watering tomato plants in pots while on vacation. By the time you’re done, you’ll have a lush garden greeting you post-vacay, no sweat required.
Table of Contents
Creative Solutions for Watering Tomato Plants in Pots While on Vacation
Heading out of town but want to make sure your potted tomato plants don’t dry out? Here are some clever DIY tricks to keep them watered:
Use Self-Watering Devices

Invest in a self-watering planter, watering spike, clay pot watering system, or DIY wicking system. These tools use the principles of evaporation and wicking to slowly disperse water to plants. Set them up properly before leaving, and they’ll water plants for upwards of 2 weeks unattended.
Self-watering devices are a great option for watering tomato plants in pots while away on vacation. Here are the steps for setting one up:
- Purchase a self-watering planter, watering spike, clay pot watering system, or materials to make a DIY wicking system. Look for ones well-suited to the number, size, and type of containers you have.
- Clean the containers that will hold your tomato plants. Ensure that there are proper openings at the base to allow for the drainage of excess water.
- Add a layer of gravel or pebbles to the bottom reservoir of the self-watering device. This helps disperse water evenly.
- Place soil in the upper pot or container that will hold the tomato plant. Use a well-draining potting mix.
- Transplant your tomato seedling or plant into the soil. Make sure the root ball is fully buried.
- Assemble the self-watering device following the product instructions. Place the upper planting container over the water reservoir base.
- Thoroughly water the soil until water drains from the bottom into the reservoir. This saturates the soil to begin.
- Fill the water reservoir fully. Some systems have a water fill tube, others you simply pour water into the base.
- Place the self-watering potted tomato in a sunny location. The water will wick up into the soil keeping plants watered for weeks.
- Check devices occasionally and refill reservoir to 1/4 capacity if needed before leaving for vacation.
Following these simple steps, a self-watering device will keep your tomato plants hydrated with no work from you while on vacation!
Ask a Friend to Water
Recruit a friend, family member, or neighbor to come by and water plants periodically. Give them a house key and detailed instructions. Tip them for their help if it’s more than a couple visits. Offer to return the favor when they go out of town!
Use Watering Globes or Bottles

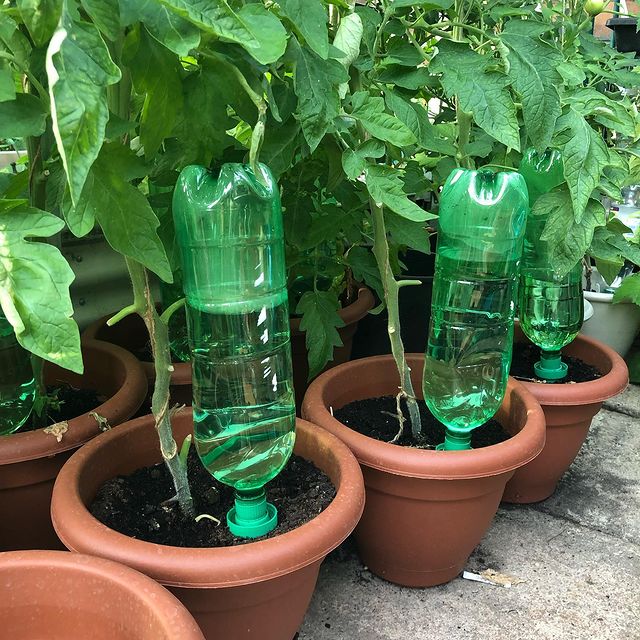
Fill watering globes or inverted soda bottles with water, and push them into the soil beside each plant. The water will slowly drip out the opening, hydrating plants for several days. Refill them before leaving town.
Watering globes and inverted soda bottles are an easy DIY way to water plants while away. Follow these steps:
- Gather supplies – watering globes or clean, empty plastic soda bottles, and a watering can or hose.
- Wash the globes or bottles thoroughly to remove any dirt or residue.
- Fill the watering vessels with water. Leave 2-3″ of air at the top to allow for expansion as water warms up.
- Water your tomato plants well before inserting the watering vessels. This ensures the soil is moist to start.
- Push each watering globe or bottle deep into the soil next to the plant. Angle it so the opening drips water toward the base.
- Push gently so the vessel is upright and supported by the surrounding soil. Only the lid should be exposed.
- For large plants, insert one vessel on each side to distribute water evenly across the root zone.
- Check that water is dripping slowly from the openings. Adjust as needed to achieve a slow drip.
- Refill globes or bottles with water every 3-5 days before leaving for vacation.
- When home, resume normal watering and remove vessels if empty. Wash and store for reuse.
Using this simple system, you can keep potted tomato plants watered for up to a week or longer while you’re away! The slow dripping provides consistent moisture to keep plants happy.
Let Plants Sit in Water
Place pots in trays filled with pebbles and water. The bottom of the pots will wick up moisture as needed. Top off the tray water level before vacation.
Here is a step-by-step guide for letting potted plants sit in water before vacation:
- Get supplies:
- Shallow trays or dishes larger than the diameter of your plant pots
- Pebbles or stones to fill trays
- Water
- Fill the trays with pebbles about 2-3 inches deep. Spread the pebbles out evenly.
- Fill the trays with water until the level is just below the pebbles.
- Place the pots on top of the pebbles in the water-filled trays. Space the pots out – don’t let them touch each other.
- Allow the potting soil to get saturated by letting the pots sit in the watered trays for 30-60 minutes before draining.
- Lift each pot out and let the excess water drain completely.
- Return the pots to the water-filled pebble trays. The bottom of the pots should sit above the water line, not submerged.
- Top off the water level in the trays as needed in the days before leaving. Aim to keep water about 1 inch below the pebble surface.
- While away, the pots will wick up water from the trays as needed, keeping the plants hydrated.
- When back from vacation, remove pots from tray and empty excess water. Resume normal watering schedule.
Group Plants Together
Move all potted plants together in a bathtub or kiddie pool lined with plastic. Fill with enough water to cover the drainage holes. The soil will absorb water as required.
You can follow this step-by-step guide for grouping potted plants together to self-water before going for vacation:
- Select a large container like a bathtub, kiddie pool, or other plastic tub. It should be big enough to hold all your potted plants.
- Line the tub with a plastic liner or heavy garbage bag. This will help hold the water.
- Place all of your potted plants inside the lined tub together, clustering them close with sides touching.
- Fill the tub with water, enough to submerge the drainage holes on the bottom of the pots. The water level should be 1-2 inches deep.
- Allow the potted plants to sit in the water bath for 30-60 minutes before removing. This saturates the soil.
- Lift each plant out and let the excess water drain completely from the pots.
- Return the pots to the tub, placing them close together.
- Fill the tub again with 1-2 inches of water. The soil will draw up only what it needs.
- Check water level daily and top off as needed before vacation.
- When back, remove the plants, drain any excess water and resume normal watering.
The collective plants will create their own self-contained humid environment. The soil will wick up moisture as required while you are away.
Install a Drip Irrigation System

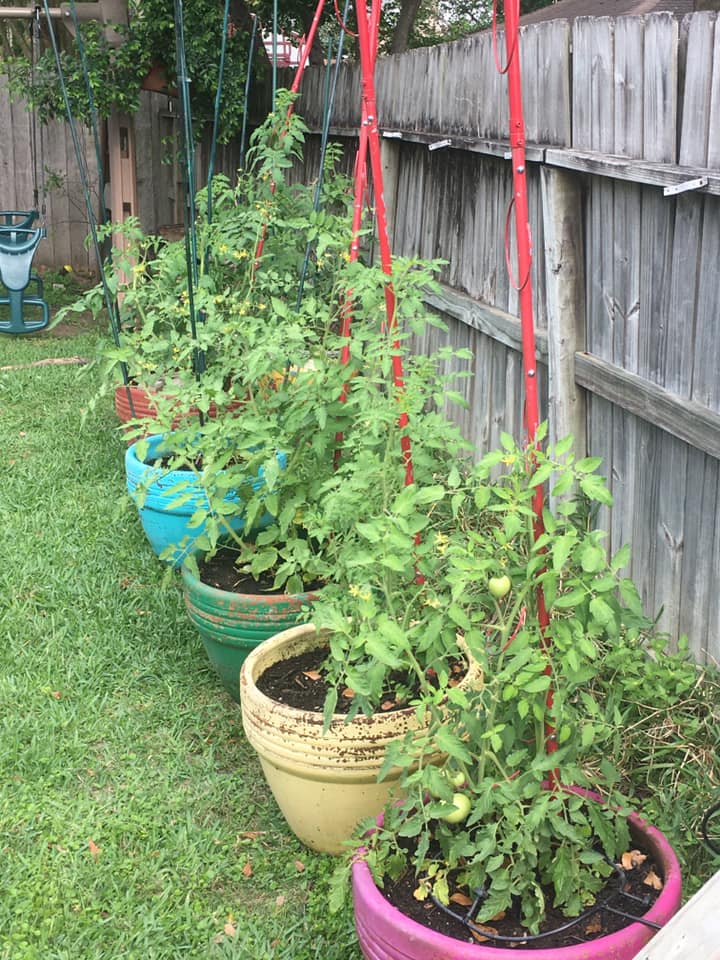
Run drip lines with a timer from your outdoor faucets to each pot. The automated system will water plants on schedule. Set the timer before you go.
Here is a step-by-step guide to installing a drip irrigation system for potted plants:
- Gather materials:
- Drip irrigation tubing or dripline with built-in emitters spaced 6-12 inches apart
- Drip irrigation fittings (tees, elbows, goof plugs, etc)
- Timer that attaches to an outdoor faucet (hose timer, digital timer, etc.)
- Pipe fasteners or stakes to secure tubing
- Scissors or tubing cutter
- Lay out the design. Sketch where the pots are located and map out the tubing path to each pot. Group pots close together on the same line.
- Cut the tubing to length. Measure and cut pieces of tubing to run from the timer to each pot, leaving extra length. Refer to your design.
- Connect tubing. Use fittings to connect tubing pieces. Push fittings together for a tight seal. Connect main line to timer.
- Secure tubing. Use fasteners to attach tubing tightly along the ground or other surface near each pot. This prevents dragging or damage.
- Attach emitters. Place an emitter directly into the soil next to each pot, or attach it to a short piece of tubing placed in the soil.
- Open faucet and test system. Check for leaks and proper flow to each emitter. Adjust as needed.
- Set timer. Program the timer to watering times and durations that suit your plants. Set it to automatic operation.
- Run system and observe. Check that the timer activates properly and provides the right amount of water to each plant as designed. Adjust programming as needed.
Water Thoroughly Right Before Leaving
Deeply soak the soil in each planter 1-2 days before departing. The moist soil should sustain plants for 5-7 days. Combine with another method for longer trips.
Tips for Keeping Tomato Plants Healthy While You’re Away
Want your tomato plants to thrive while you’re on vacation? Follow these tips:
- Move container plants to a shady spot to reduce watering needs.
- Use moisture-retaining soil or water crystals in pots to store extra water.
- Add 2-3 inches of mulch atop the soil to slow evaporation.
- Remove any flowers or fruit before leaving so plants focus their energy on roots and leaves.
- Stake/cage tall tomato varieties to prevent storm damage while you’re gone.
- Prune back any leggy or yellowing growth to reduce transpiration.
- Check forecasts, and make arrangements for moving container plants indoors if extreme weather is coming.
- Have a friend visit periodically to scan for pests and pick ripe tomatoes.
Don’t let worries about your potted tomato plants ruin your vacation vibes. With this advice for vacation watering methods, and preparation tips, you can head out of town knowing your tomatoes are hydrated and happy. Bon voyage! Come home to healthy plants and ripe, delicious tomatoes.
Watering Tomato Plants in Pots While on Vacation doesn’t have to be difficult or stressful. With some simple DIY watering tools, help from friends, or automated irrigation, you can keep your plants in good shape. Use these creative solutions and follow the handy tips above, so you can fully relax and enjoy your well-deserved time off.
